WebOps allows you to create websites using either:
- Build With AI
- Build it Yourself
This guide explains the complete website creation process from onboarding to website generation.
Step 1: Sign In to Your Dashboard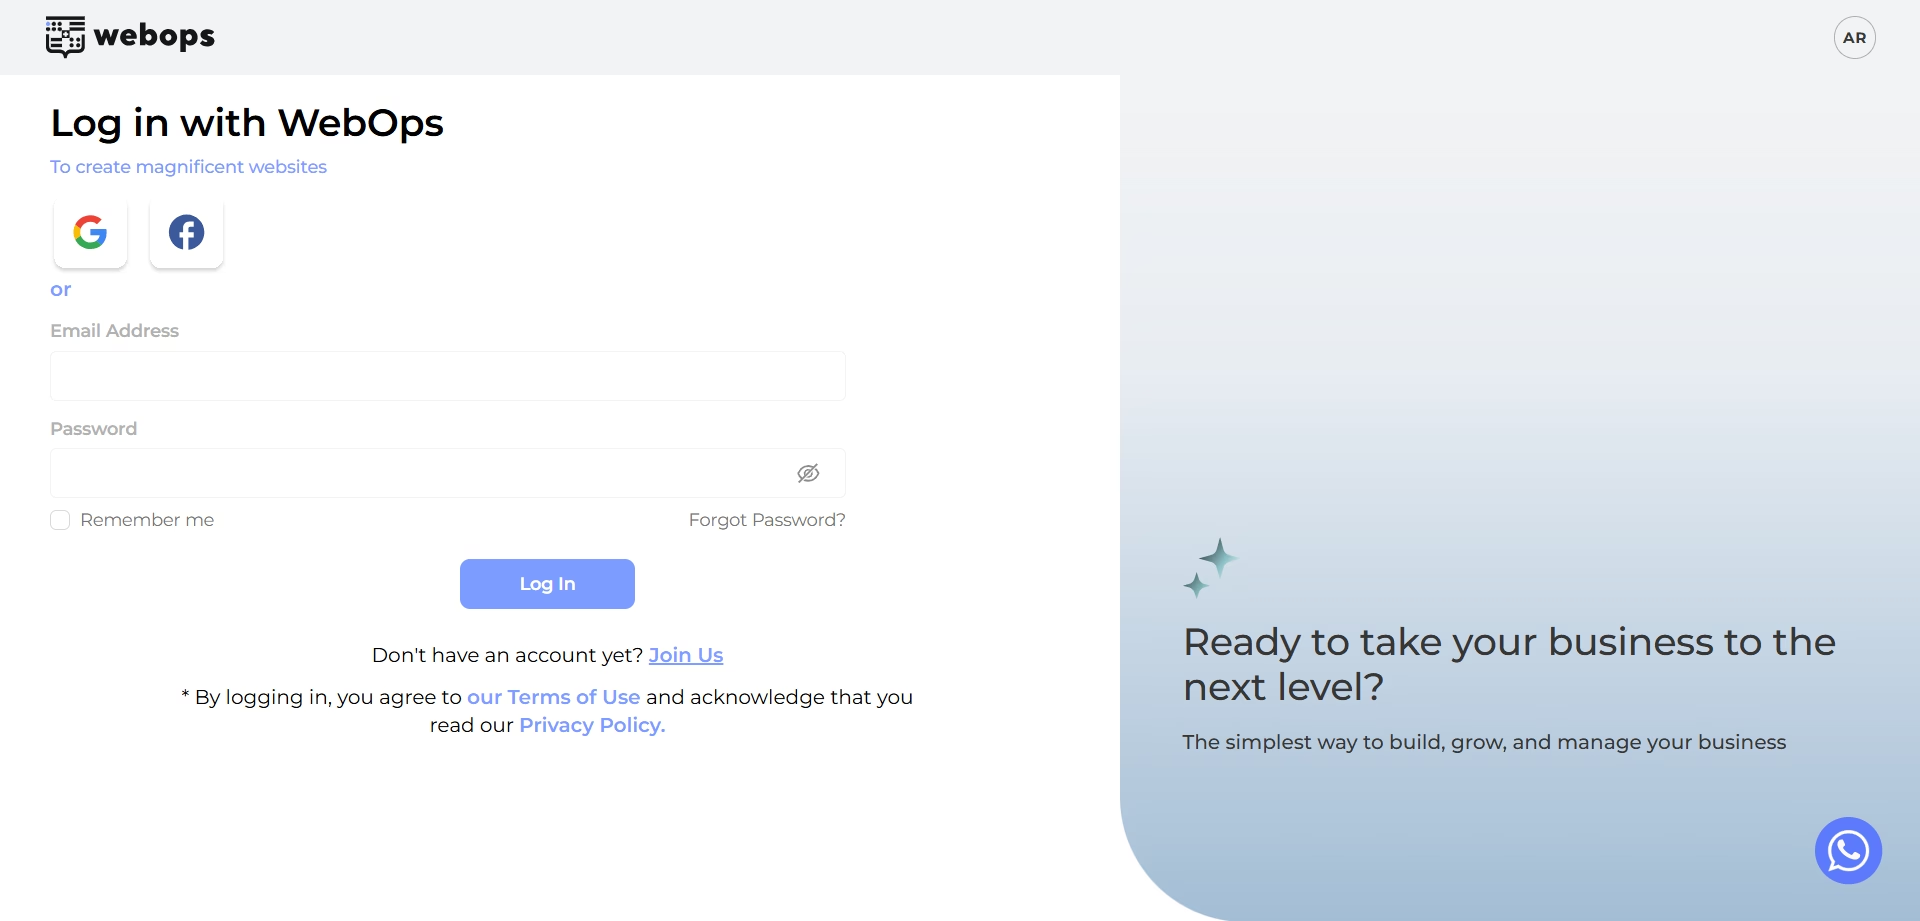 #
#
Go to: app.thewebops.com
Click: Sign In
Enter your email and password.
Once authenticated, you’ll land on your Dashboard where you can manage your websites.
Step 2: Create a New Website #
From your Dashboard:
Click: Create New Site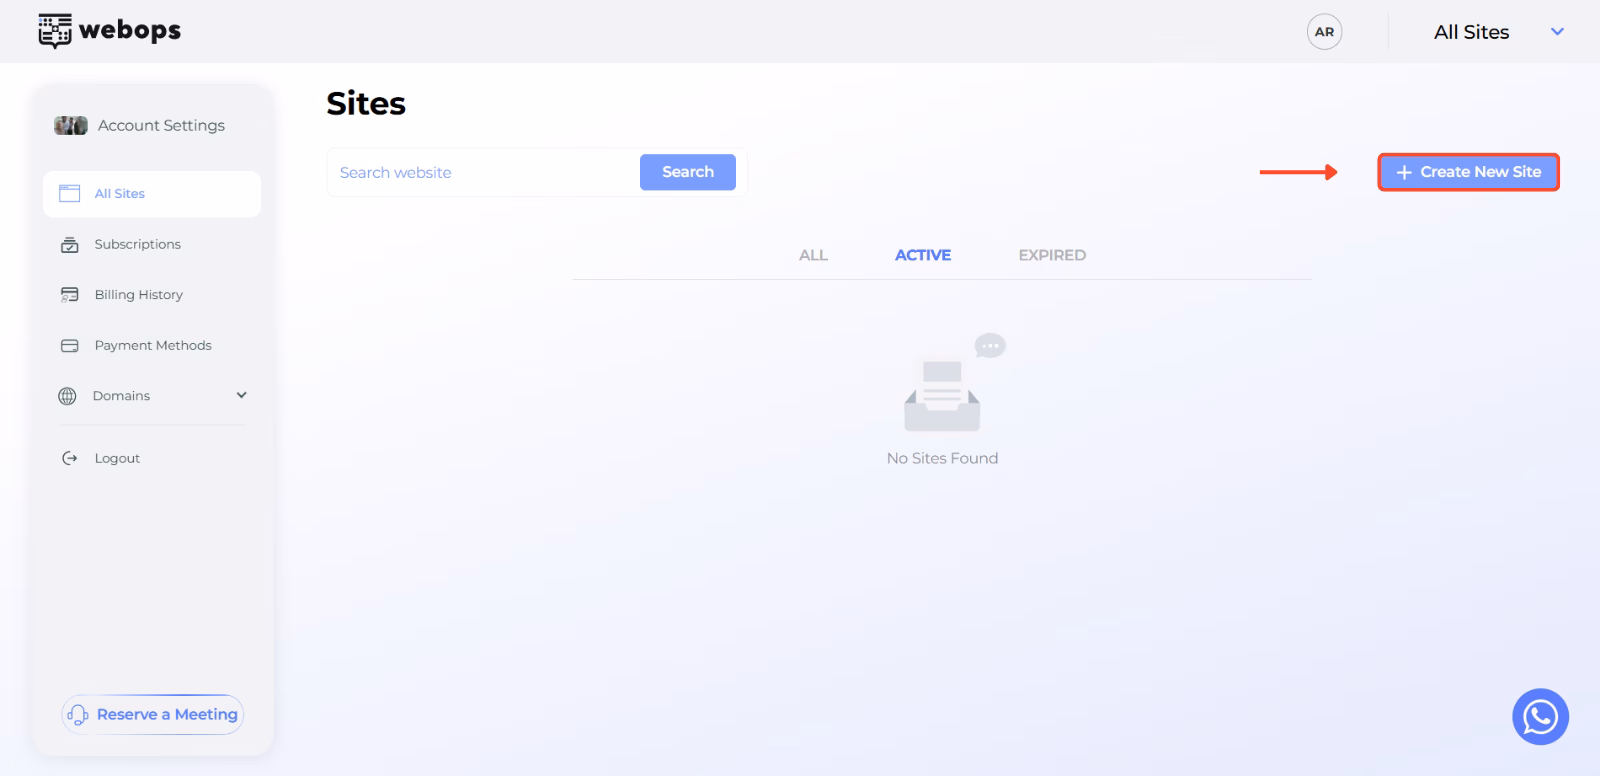
What happens next depends on your account.
If you do not currently have an active free website
You will be redirected directly to the onboarding process to create your free website.
If you already have an active free website
You will first be redirected to the pricing plans page to choose a paid plan for your new website.
After selecting your plan and completing payment, you can continue creating your new website.
If you want your new website to become your free website instead, you can first upgrade your current free website to a paid plan and then create a new free website afterwards.
Step 3: Complete the Onboarding Questions #
Before building your website, WebOps will ask you a few questions to better understand your business and website goals.
The information you provide helps WebOps generate and prepare your website experience.
Step 3.1: About Your Business #
In this step, you will answer:
- What is your project name?
- Is this for a new or existing business? (Optional)
- Describe your business? (Optional)
The business description helps AI understand your business and generate more relevant content and layouts.
Click: Next to continue.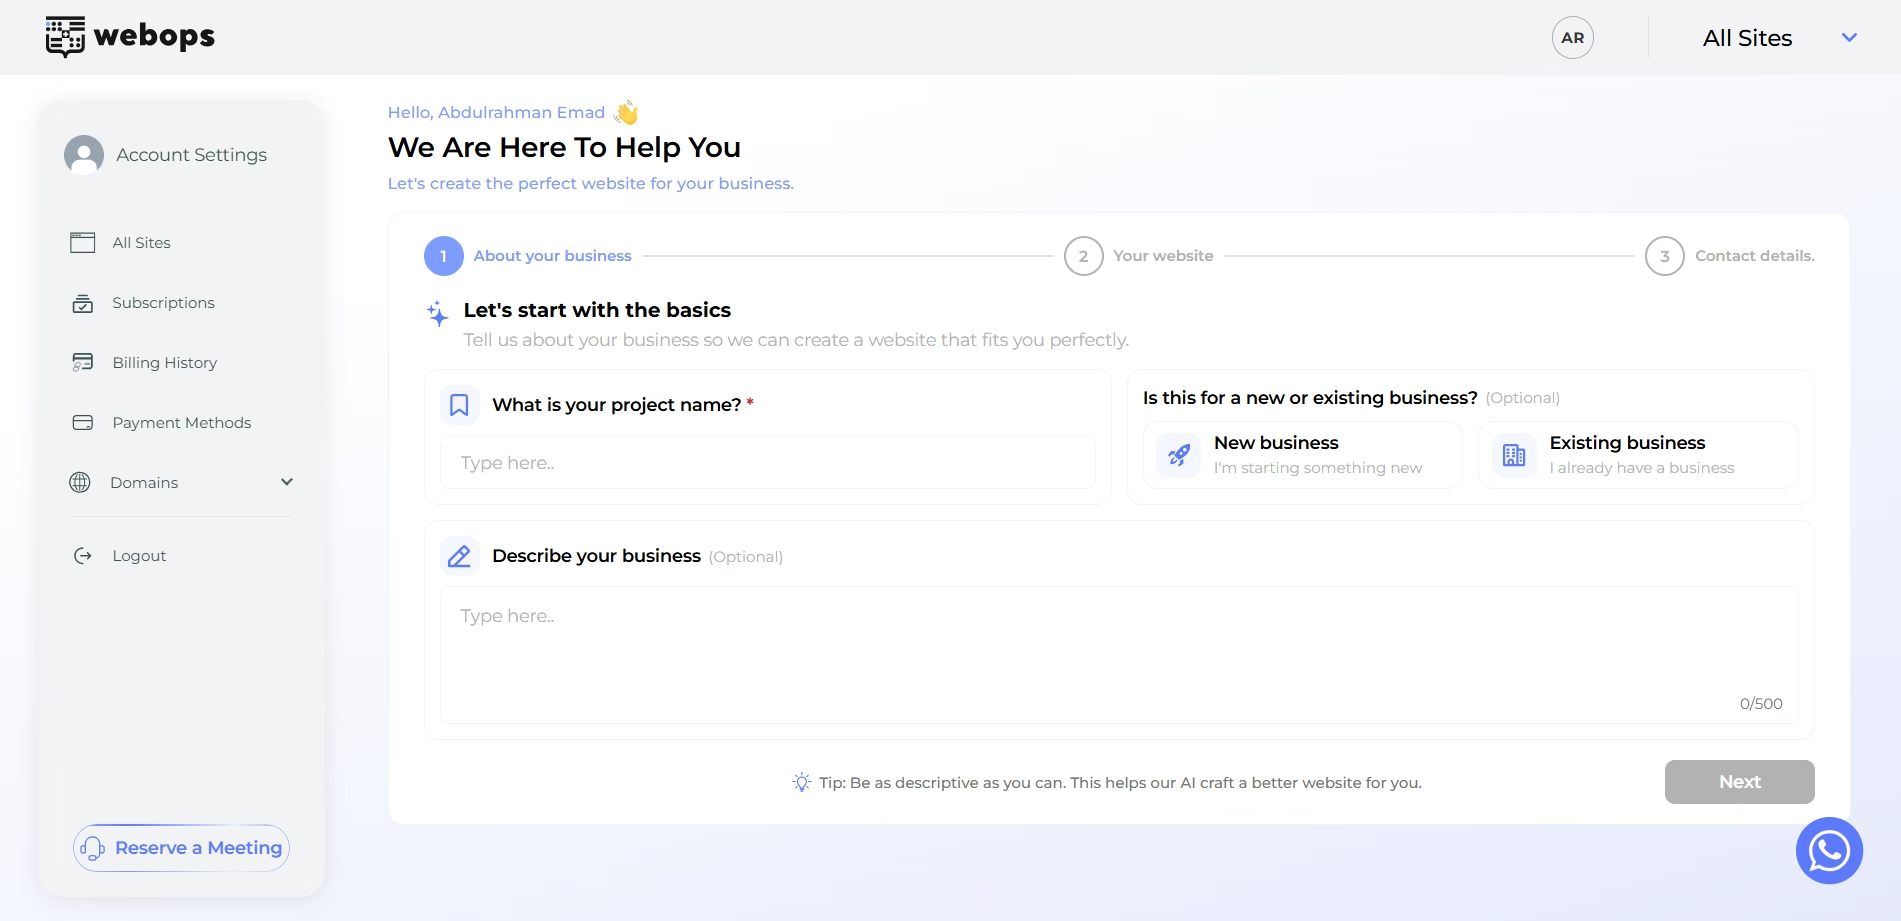
Step 3.2: Your Website #
In this step, you will answer:
- What is the industry of your website?
- What do you want to do with your website?
- Upload your logo (Optional)
The answer to:
What do you want to do with your website?
is important because it helps WebOps determine the type of website to generate.
For example:
- selecting Online Store (Ecommerce) helps generate an e-commerce website experience
- selecting Showcase Website helps generate a business or informational website
The AI uses your answers to help choose suitable layouts, structure, and website design automatically.
Click: Next to continue.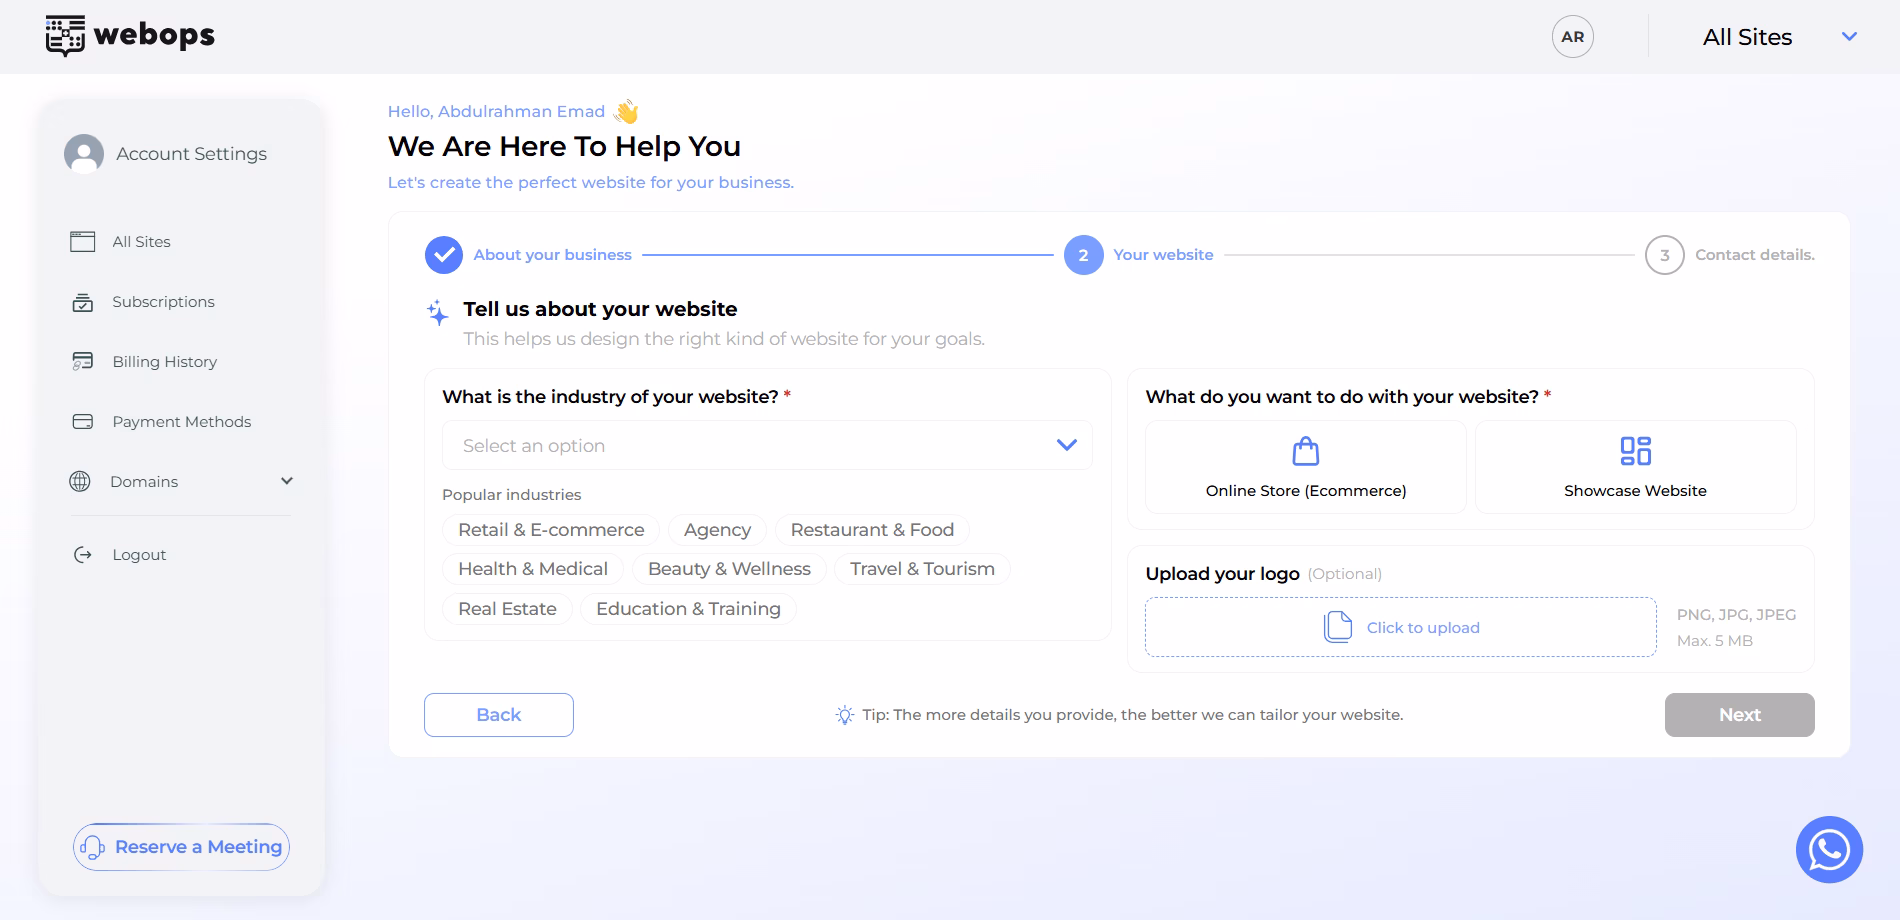
Step 3.3: Contact Details #
In this step, you can optionally add:
- Email address
- Phone number
- Business address
This information may be used inside your generated website such as contact sections or footer details.
Click: Next to continue.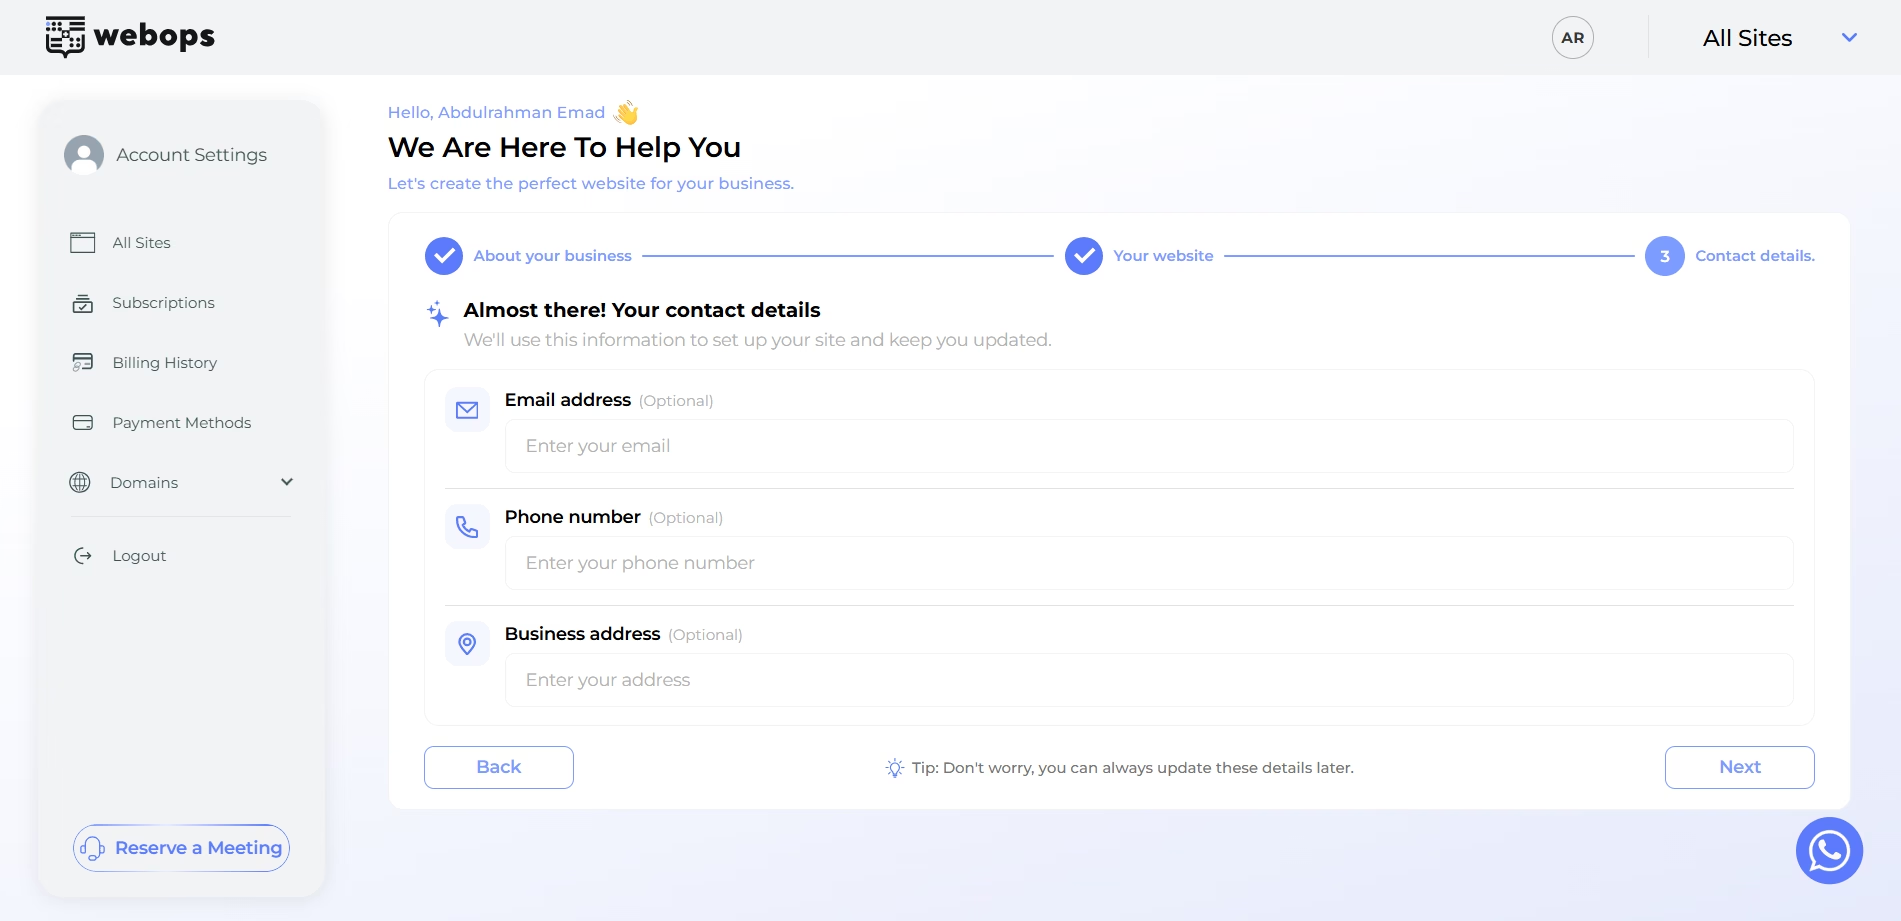
Step 4: Choose Your Building Method #
After completing onboarding, you will choose how you want to build your website.
WebOps provides two website building methods:
- Build With AI
- Build it Yourself
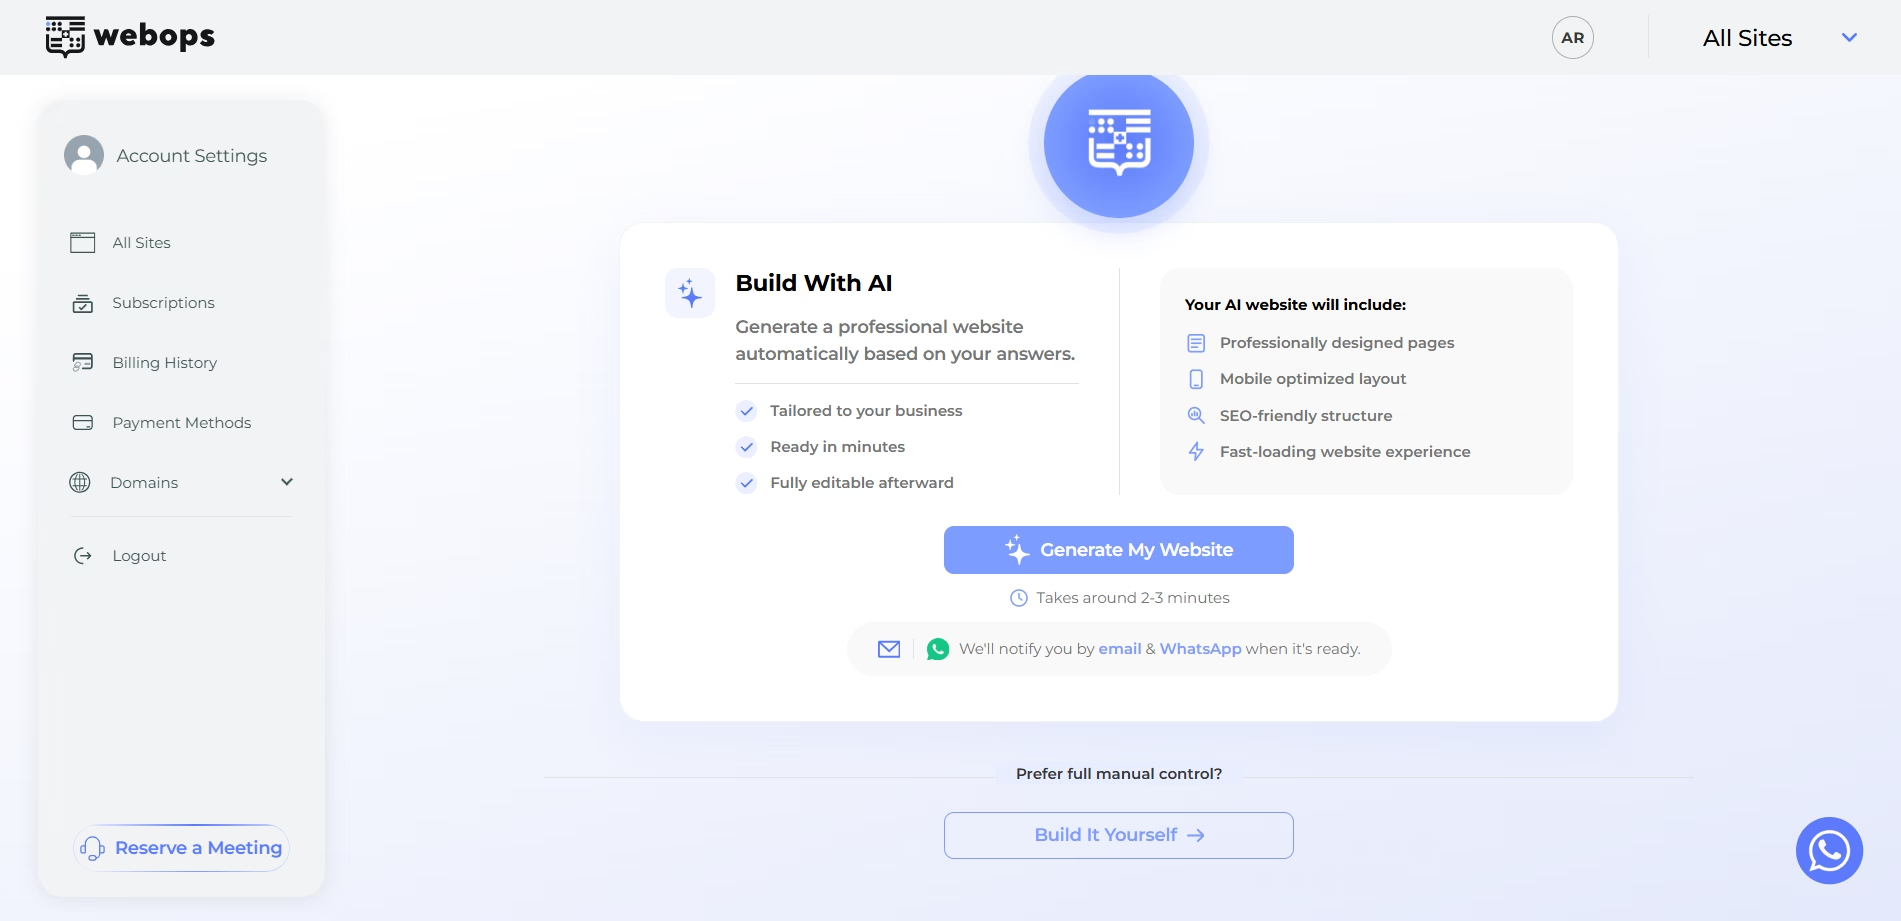
Option 1: Build With AI #
Build With AI automatically generates your website using the information you provided during onboarding.
The AI helps:
- generate website structure
- create layouts
- prepare website content
- choose suitable website design
- generate e-commerce or showcase experiences depending on your answers
After selecting: Build With AI
paid websites will first continue to the payment step if payment has not been completed yet.
After payment is completed, WebOps will begin generating your website automatically.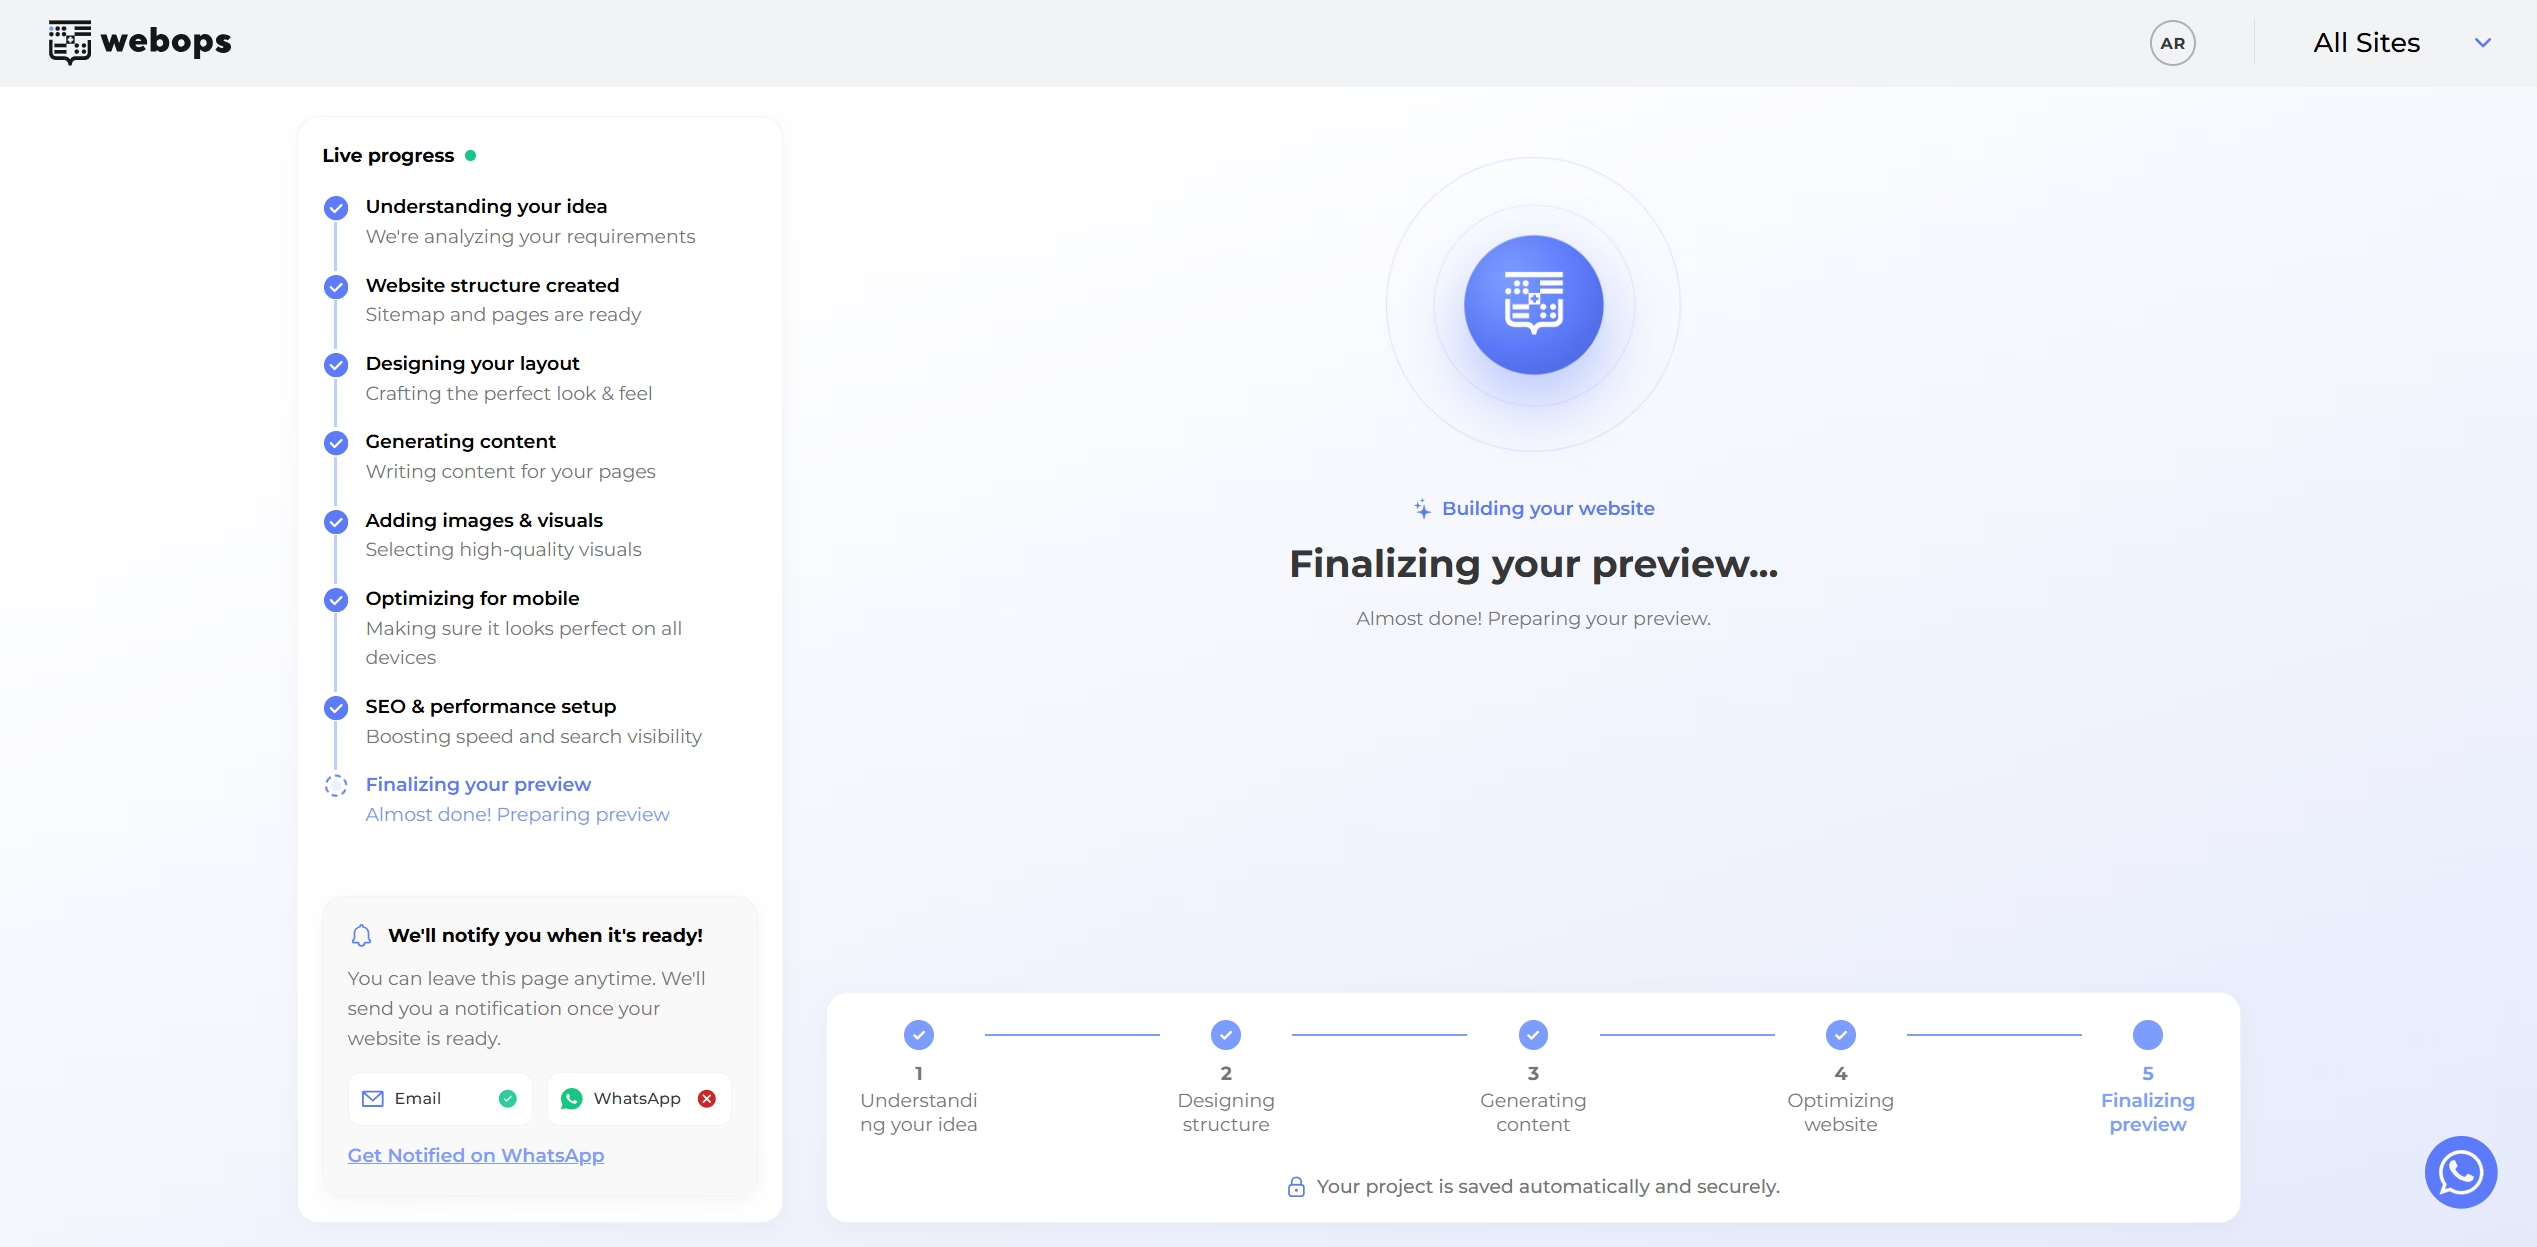
Once the generation process finishes:
- you may receive an email notification
- you may also receive a WhatsApp notification if your phone number is verified
After generation completes, you will be redirected to a congratulations page with a live preview of your website.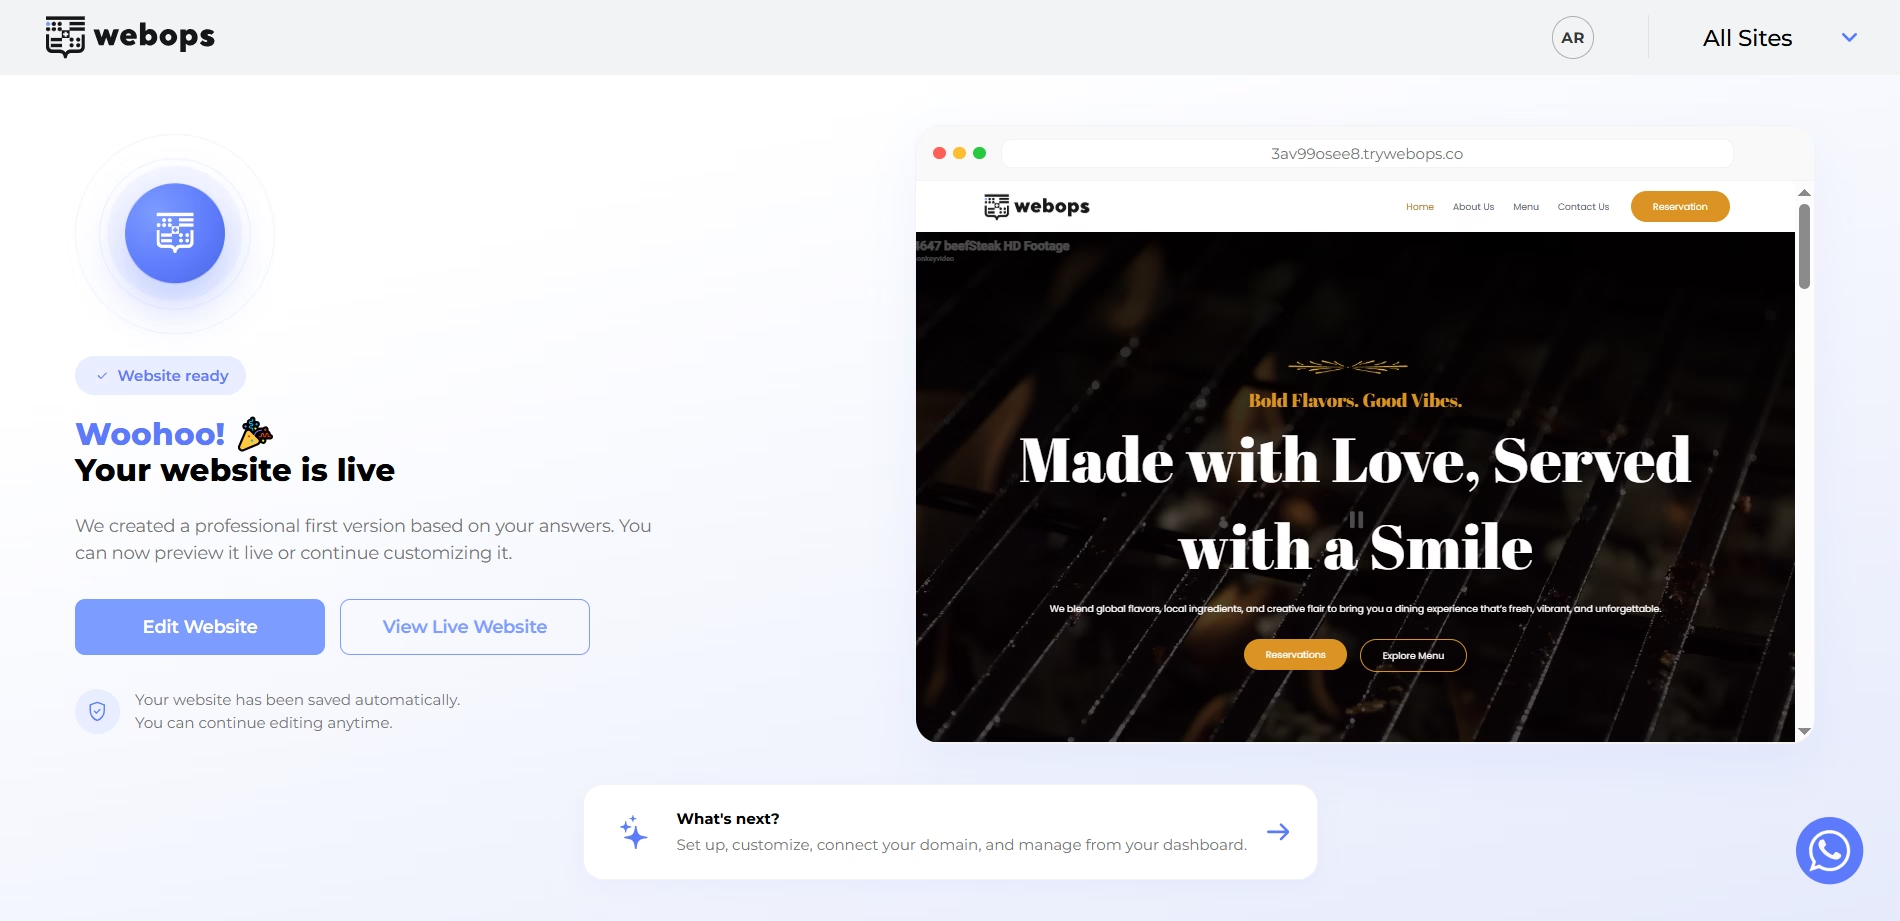
Learn more:
How Build With AI Works in WebOps
Option 2: Build it Yourself #
Build it Yourself prepares a clean website environment so you can manually build and customize your website.
After selecting: Build it Yourself
paid websites will first continue to the payment step if payment has not been completed yet.
After payment is completed, WebOps will prepare your website automatically.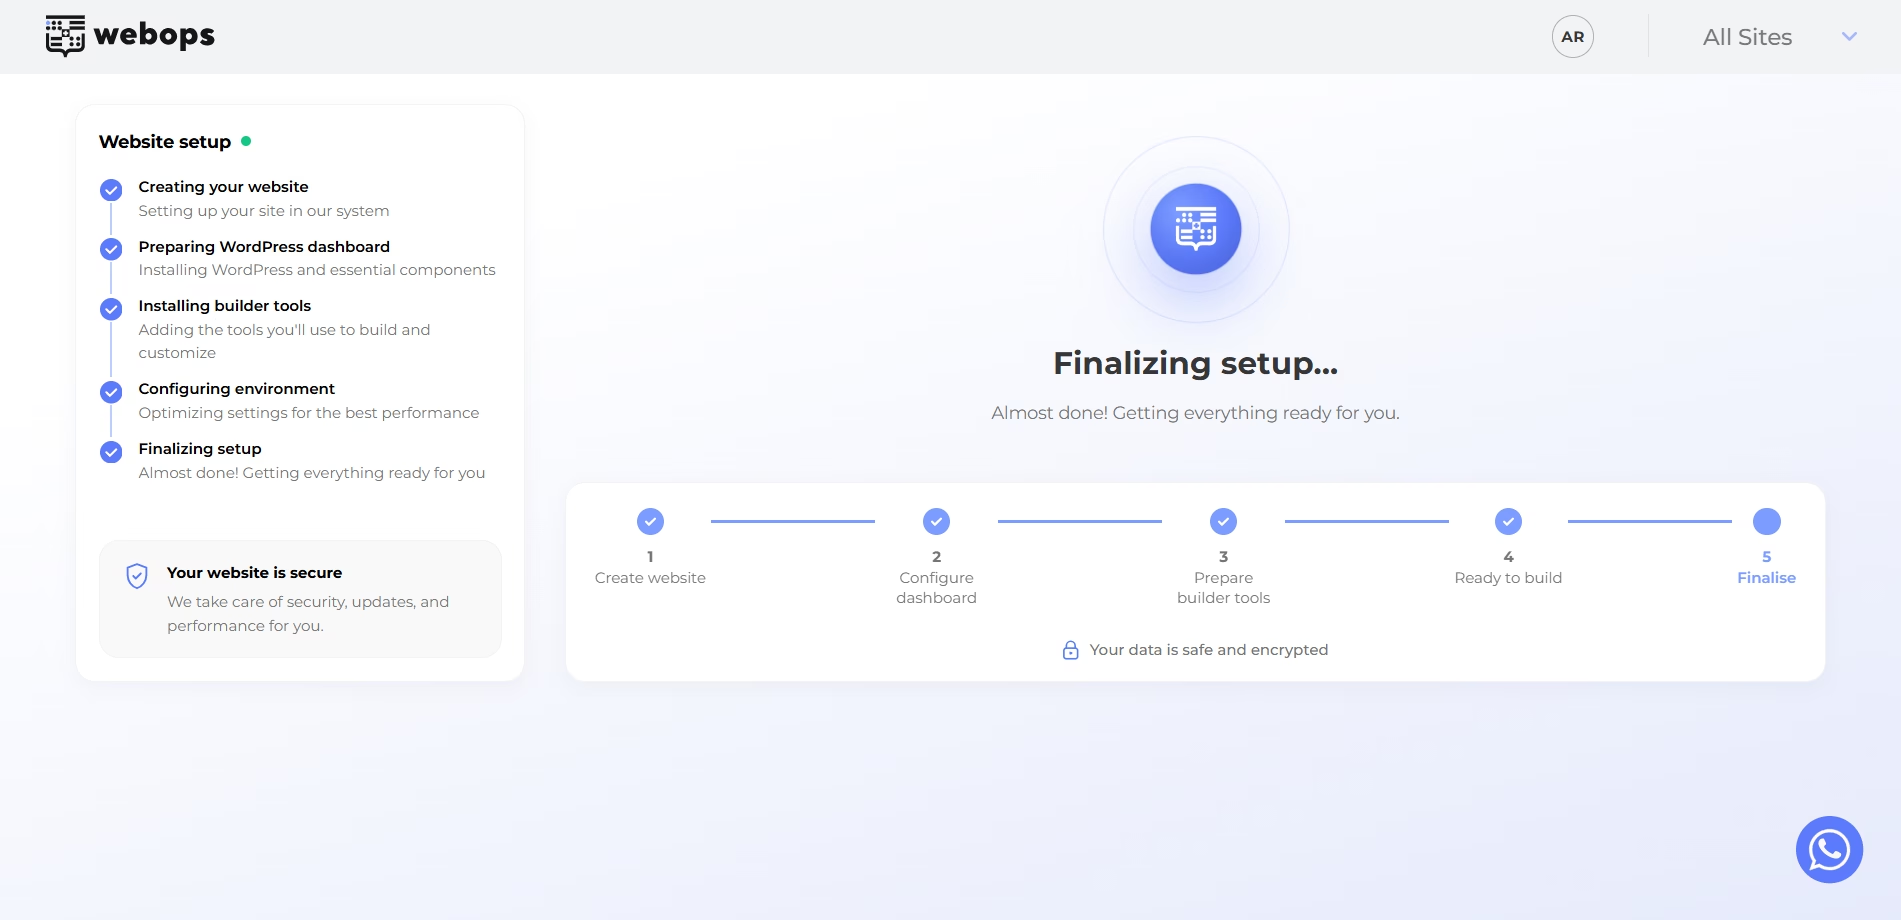
Once preparation finishes, you will be redirected to a congratulations page.
Click: Start Building to continue building your website manually.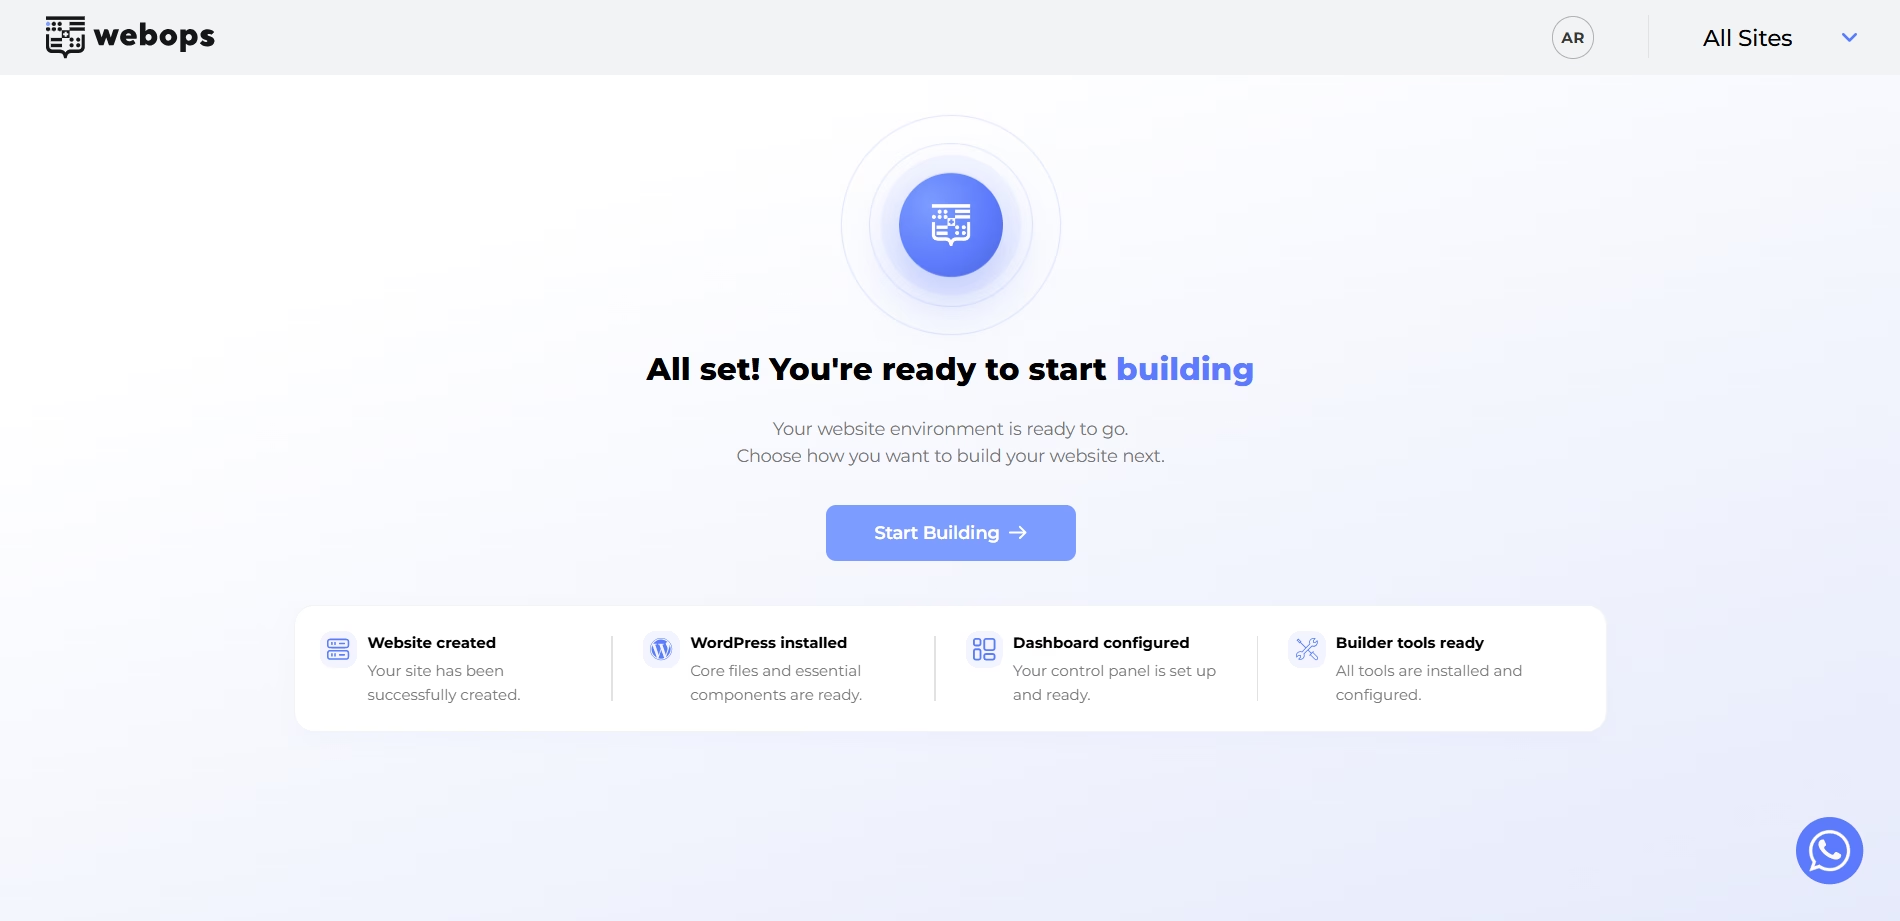
After clicking: Start Building you will see the available manual website building options.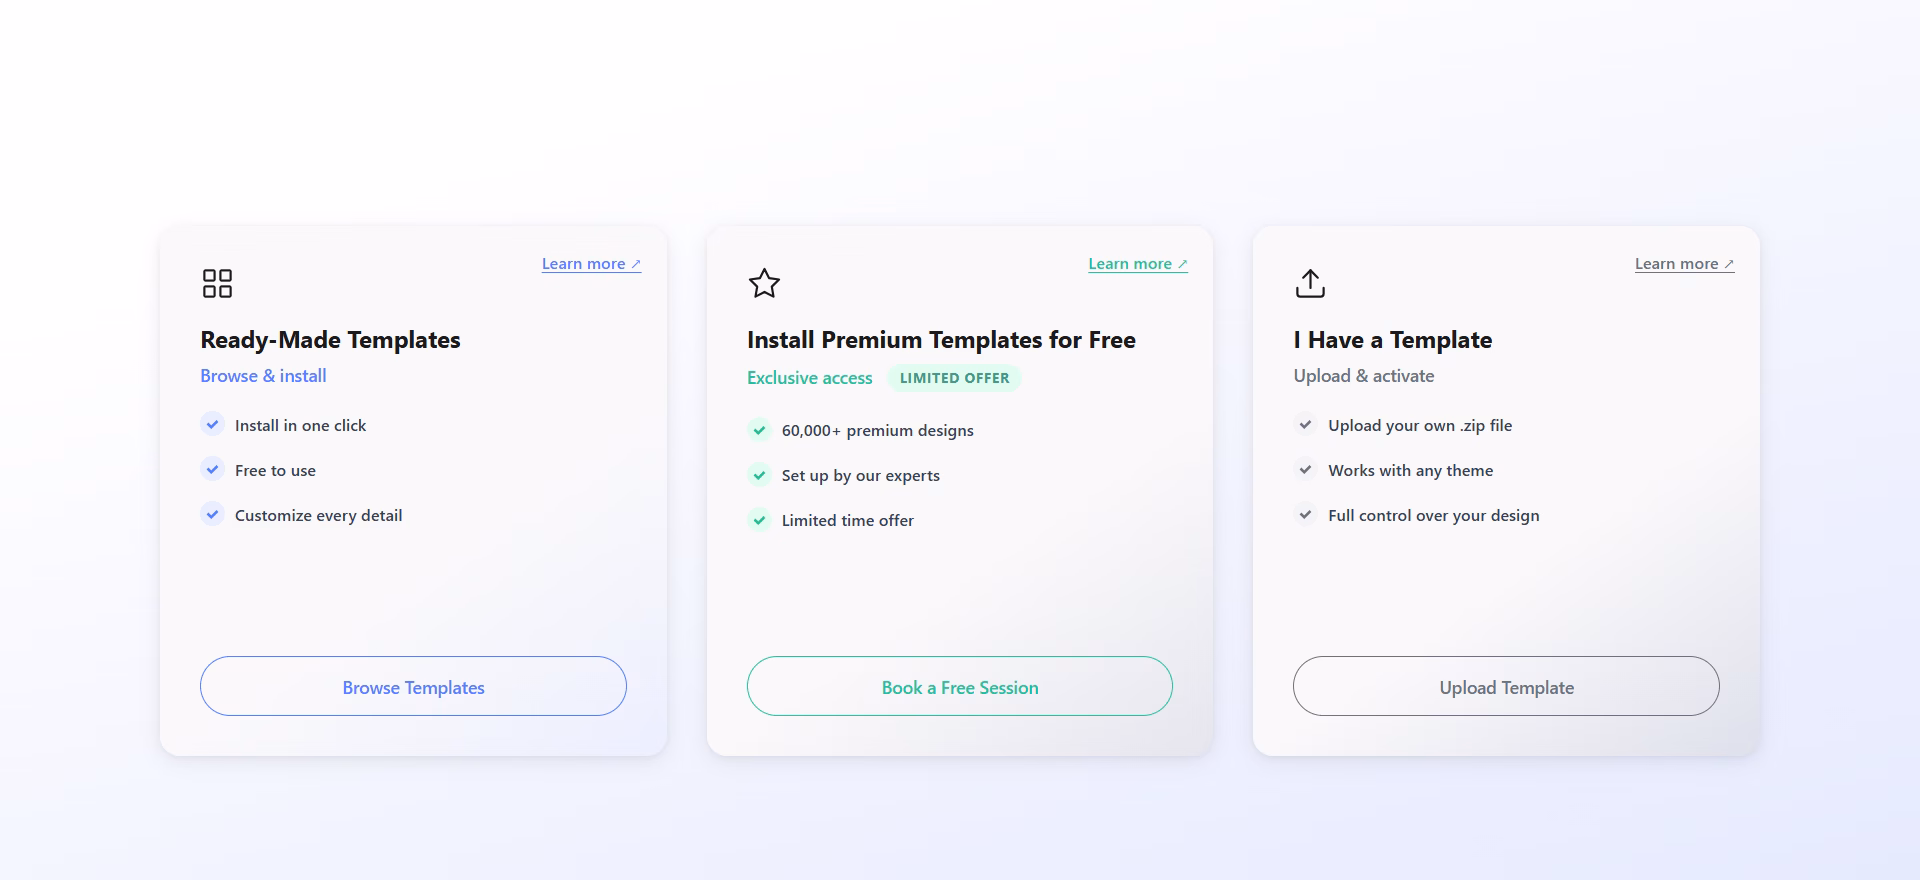
Learn more:
Build a Website Yourself in WebOps
What Happens Next? #
After creating your website, you will have access to your WordPress Dashboard where you can:
- edit pages
- customize design
- upload images
- manage plugins
- publish your website
- manage domains and settings
Your website is now ready for customization and publishing.
Helpful Tip #
For the best website-building experience, we recommend using the desktop version of WebOps.