Your WebOps Dashboard is the central place for managing your website, domains, subscription, and launch progress.
The dashboard layout and available actions may slightly change depending on your website plan, setup progress, and subscription type.
This guide explains every section of the dashboard and how to use it.
1. Top Navigation Bar #
At the top of the dashboard, you will find:
- the WebOps logo
- the language switcher
- the current website selector
The website selector allows you to quickly switch between multiple websites connected to your account.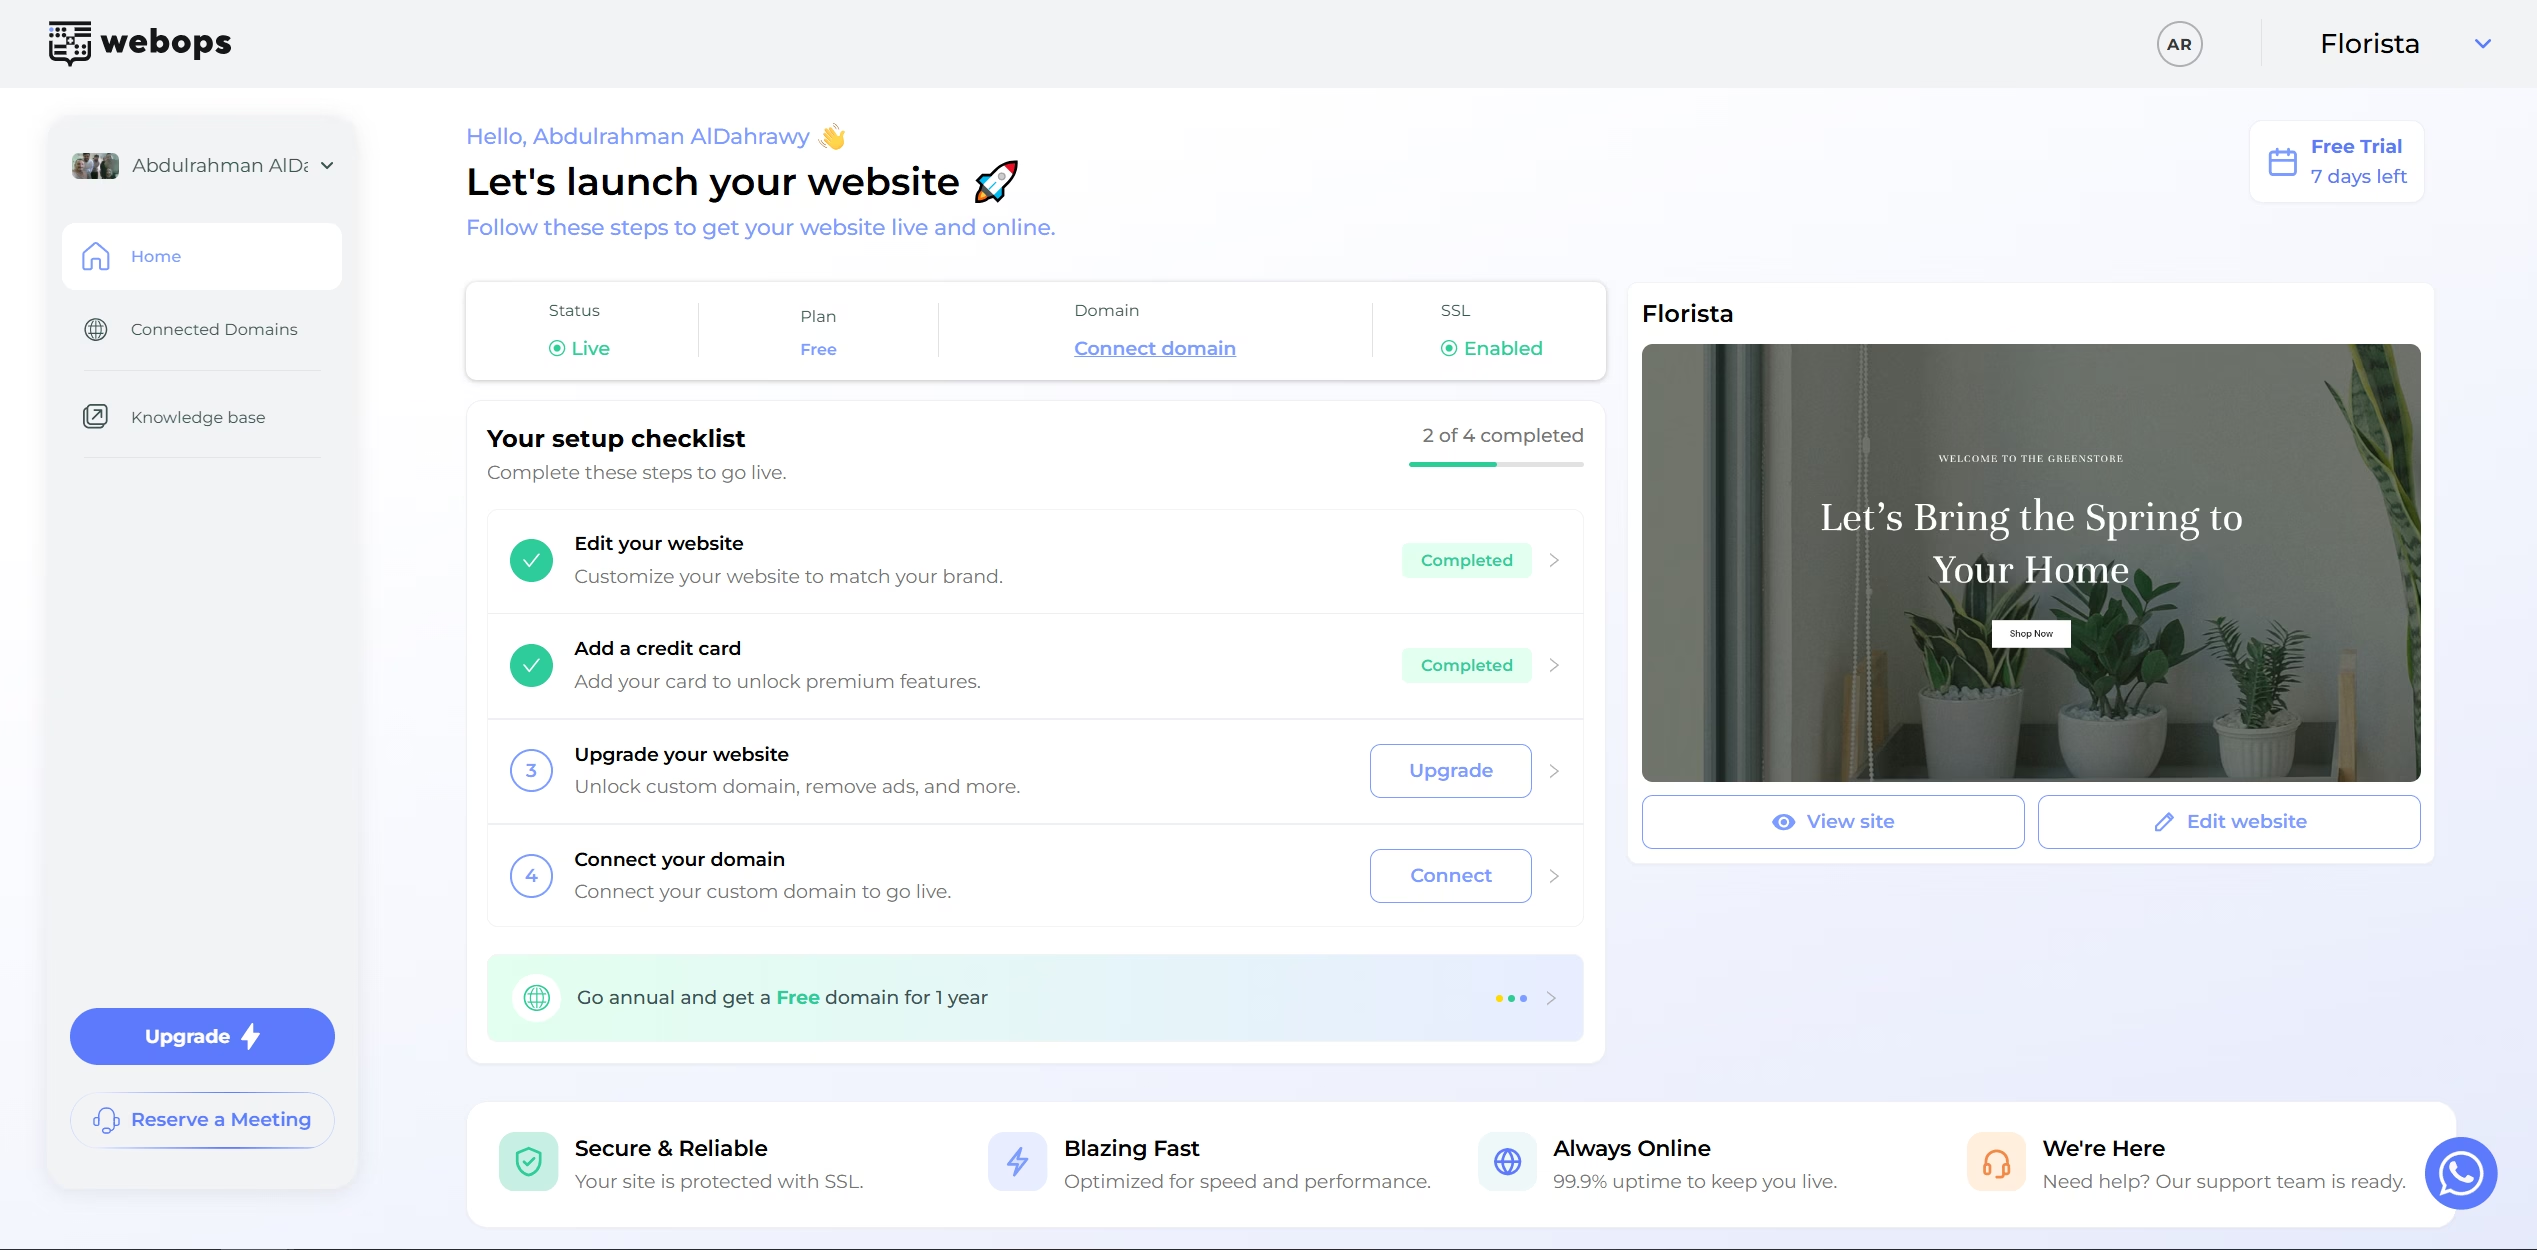
2. Website Status Panel #
The status panel provides a quick overview of your website information.
It includes:
- Status
- Plan
- Domain
- SSL
The Domain section also allows you to quickly connect a custom domain.
3. Setup Checklist #
The setup checklist helps guide you through the remaining steps required to fully launch your website.
The checklist is dynamic and changes depending on:
- your current plan
- whether your site is free or paid
- monthly or annual billing
- completed setup steps
Examples of checklist actions include:
- Edit your website
- Add a credit card
- Upgrade your website
- Switch to annual
- Claim your free domain
- Connect your domain
Each checklist item includes:
- a status indicator
- an action button
- completion tracking
The progress bar updates automatically as you complete steps.
4. Free Website Dashboard Experience #
Free websites display upgrade-focused checklist items.
These may include:
- Upgrade your website
- Connect your domain
Free websites also display:
- a Free Trial badge
- remaining trial days
Free websites must be upgraded before claiming a free custom domain.
5. Paid Monthly Dashboard Experience #
Paid monthly plans display additional upgrade options such as:
- Switch to annual
Switching to an annual plan unlocks eligibility for a free domain for 1 year.
Monthly plans do not yet display the Claim your free domain step.
6. Paid Annual Dashboard Experience #
Annual plans include the full launch checklist experience.
Additional actions may include:
- Claim your free domain
Once annual billing is active, the Switch to annual step becomes completed automatically.
Annual plans are eligible for:
- one free domain for 1 year
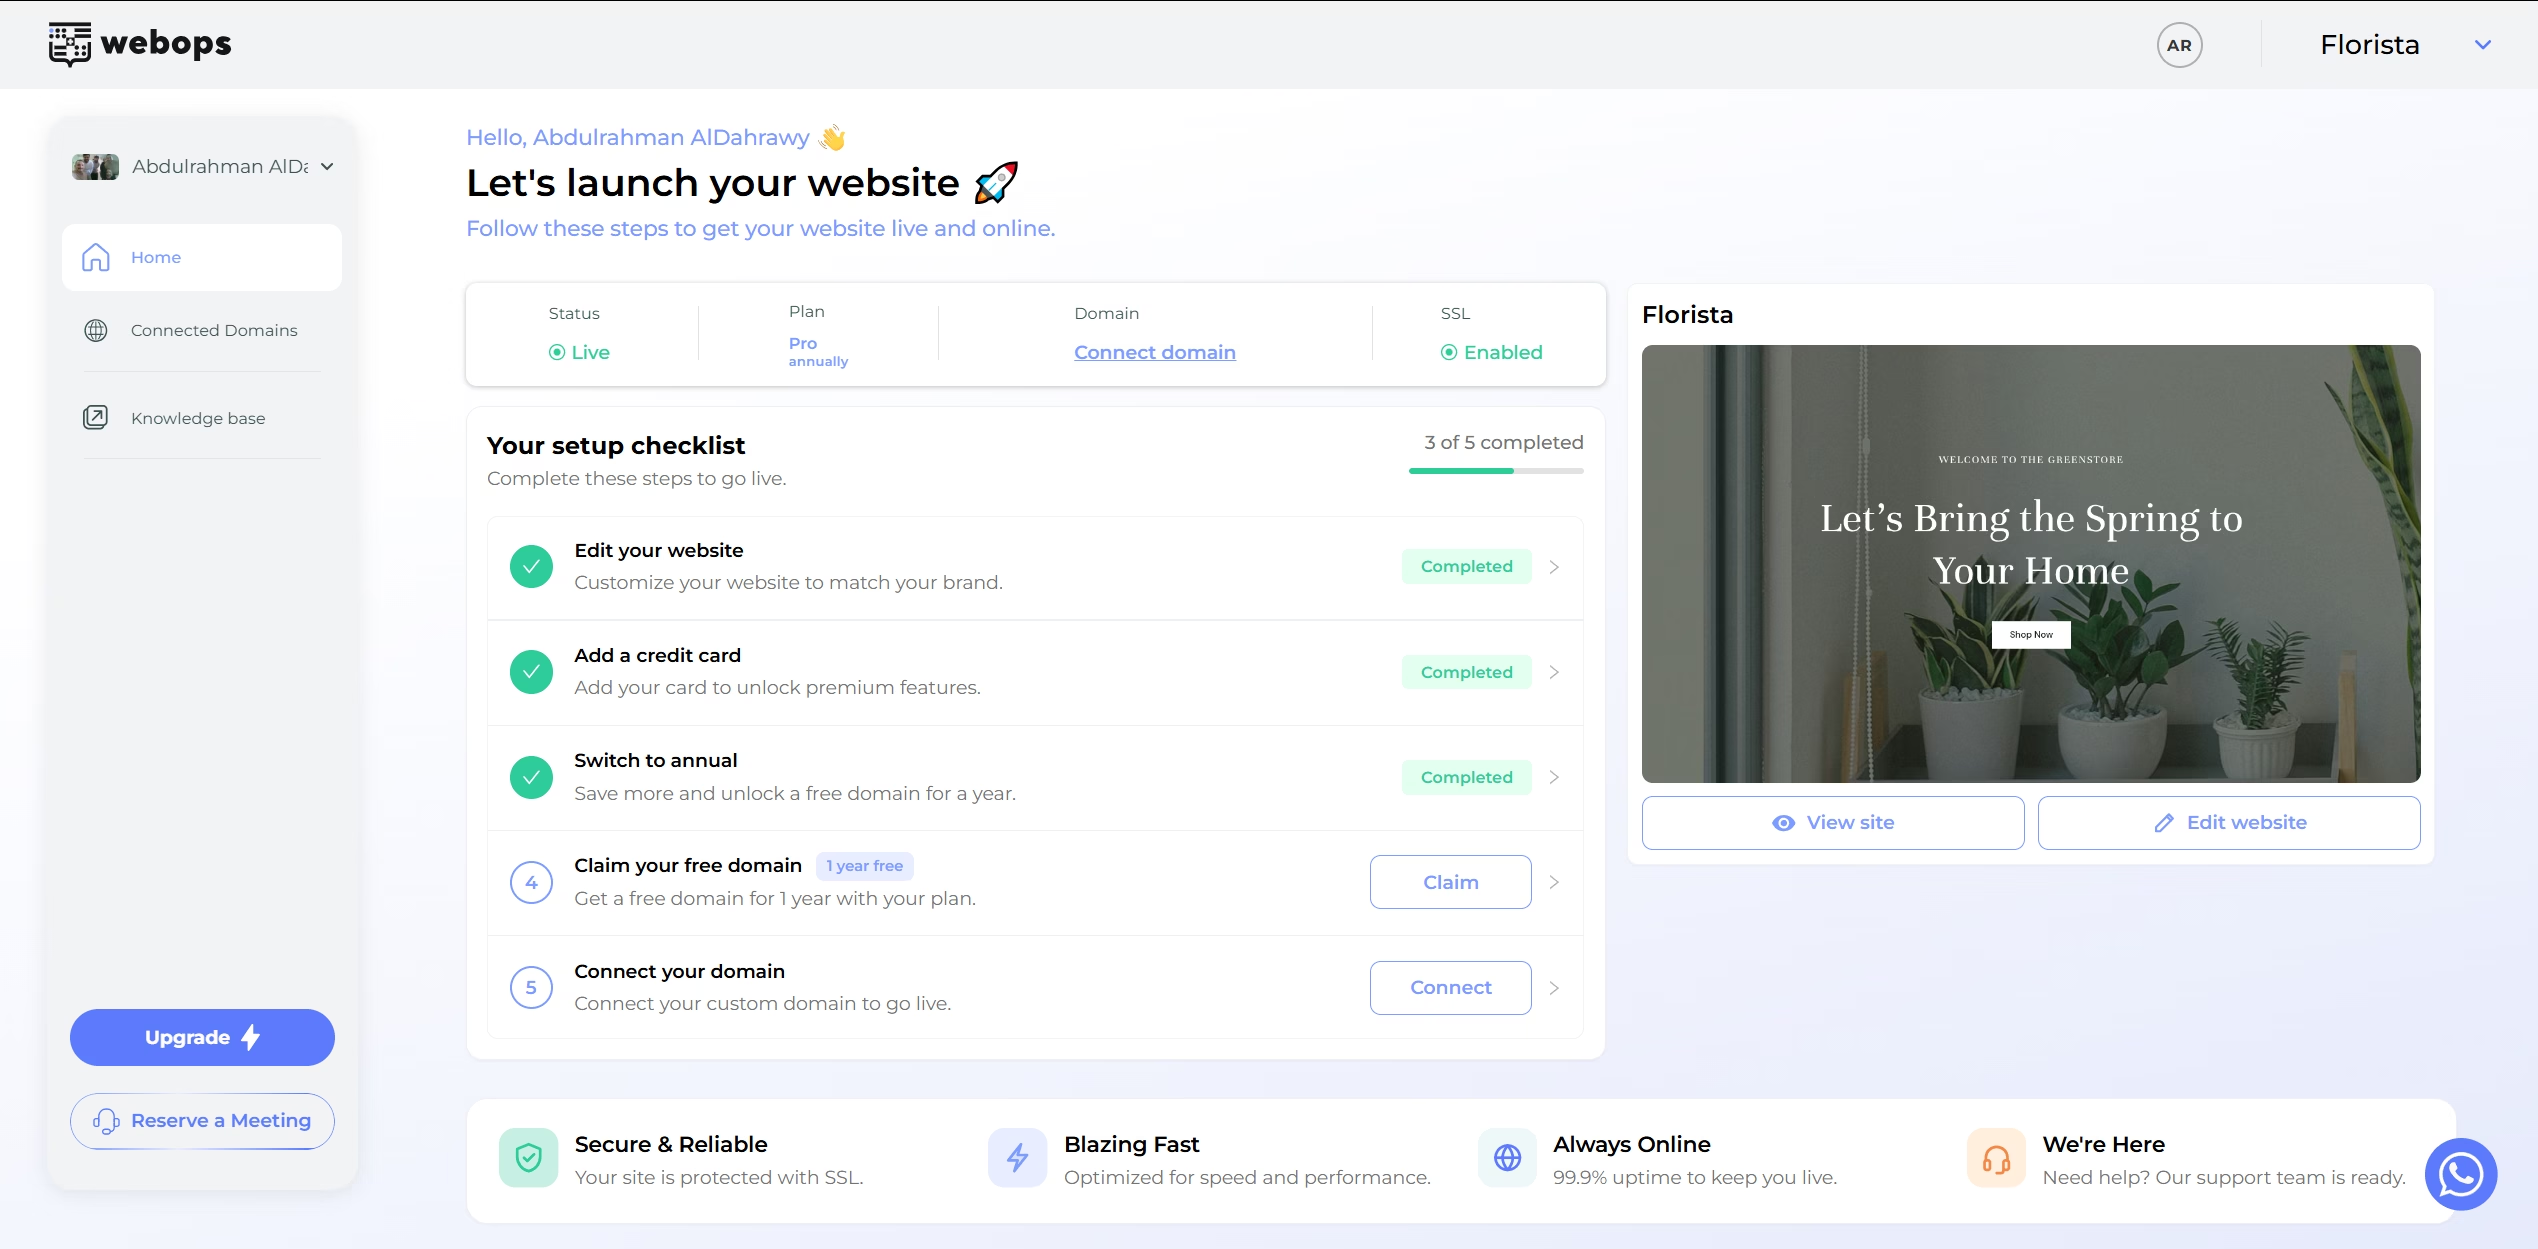
7. Website Preview Card #
On the right side of the dashboard, you will see a live preview card for your website.
The card includes:
- website name
- live preview image
- View site button
- Edit website button
These actions allow you to quickly:
- open your live website
- access the Website editor
8. Quick Website Actions #
The dashboard provides quick access to important website tools.
Common actions include:
- View website
- Edit website
- Connect domain
- Upgrade Plan
These shortcuts help you manage your website faster.
9. Sidebar Navigation #
The left sidebar contains the main website navigation.
Sections include:
- Home
- Connected Domains
- Knowledge base
- Upgrade
- Reserve a Meeting
These sections allow you to access your website tools and support resources quickly.
10. Reserve a Meeting #
The Reserve a Meeting button allows you to schedule a meeting with the WebOps team for assistance with:
- website setup
- premium templates
- technical guidance
- onboarding help
11. WhatsApp Support Button #
At the bottom-right corner of the dashboard, you will see a floating WhatsApp button.
Clicking this button opens a WhatsApp conversation with the WebOps team for quick support and assistance.
12. Profile Menu #
Clicking your profile section in the sidebar opens the account menu.
Available sections include:
- Account Settings
- Subscriptions
- Billing History
- Payment Methods
- Domains
- Logout
From here you can manage your account, billing, subscriptions, and domain settings.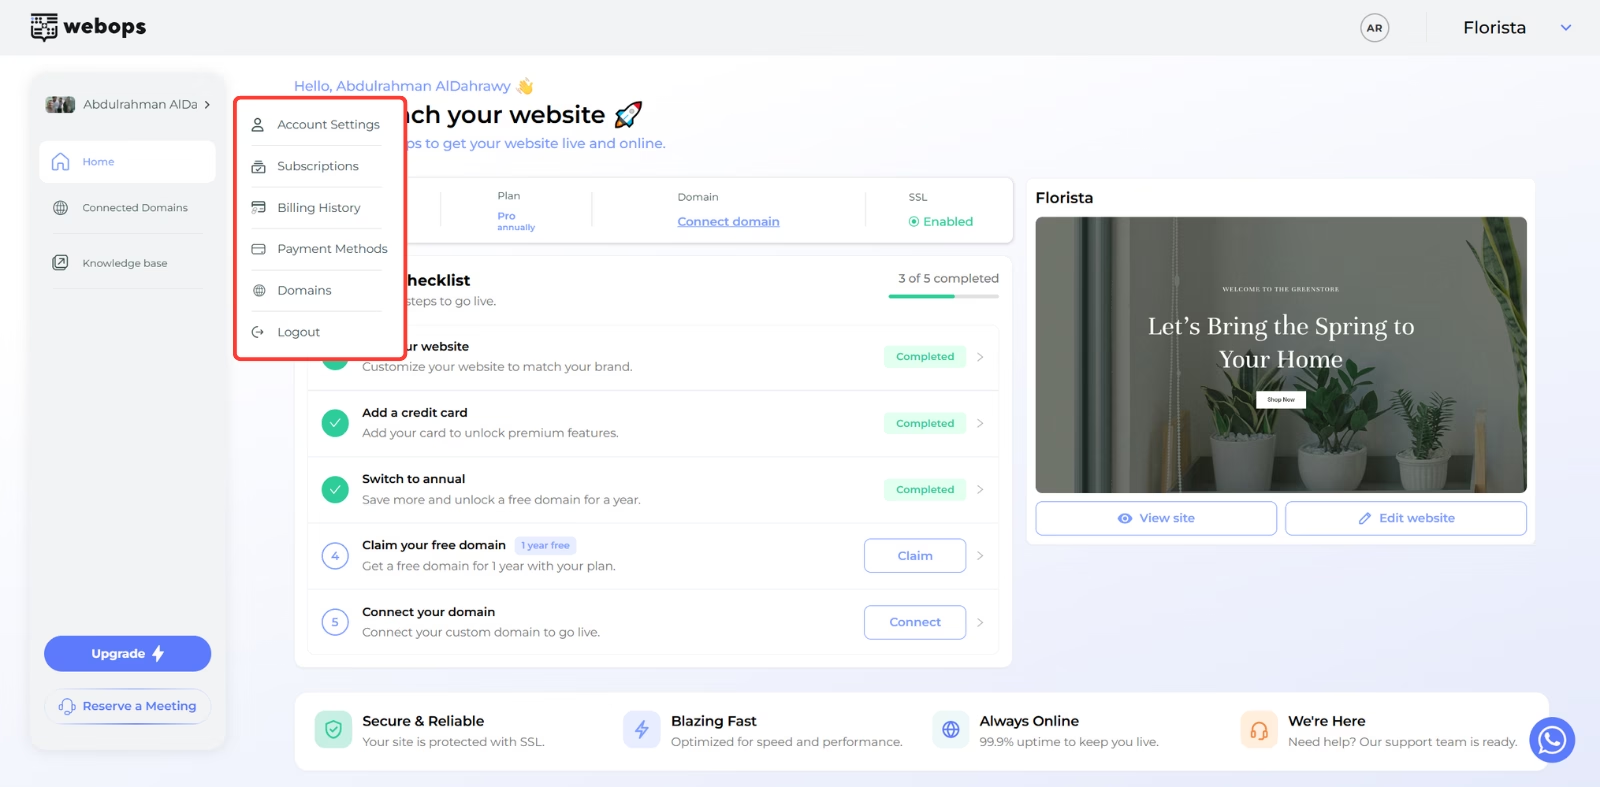
Helpful Tips #
- Complete your setup checklist to fully launch your website
- Connect a custom domain to make your site publicly accessible
- Annual plans unlock a free domain for 1 year
- Use the Edit website button to customize your site in WordPress
- Use the website selector at the top to switch between projects quickly