WebOps allows eligible users to claim a free domain for the first year when using an annual plan.
This guide explains who is eligible, how free domain claims work, and how to complete the claiming process.
Step 1: Verify Eligibility #
Free domains are available only for websites using an annual plan.
Important:
- free domain eligibility is applied per website
- each eligible website can claim one free domain
- monthly plans are not eligible
If your website qualifies, you will see a free domain claim section inside your dashboard.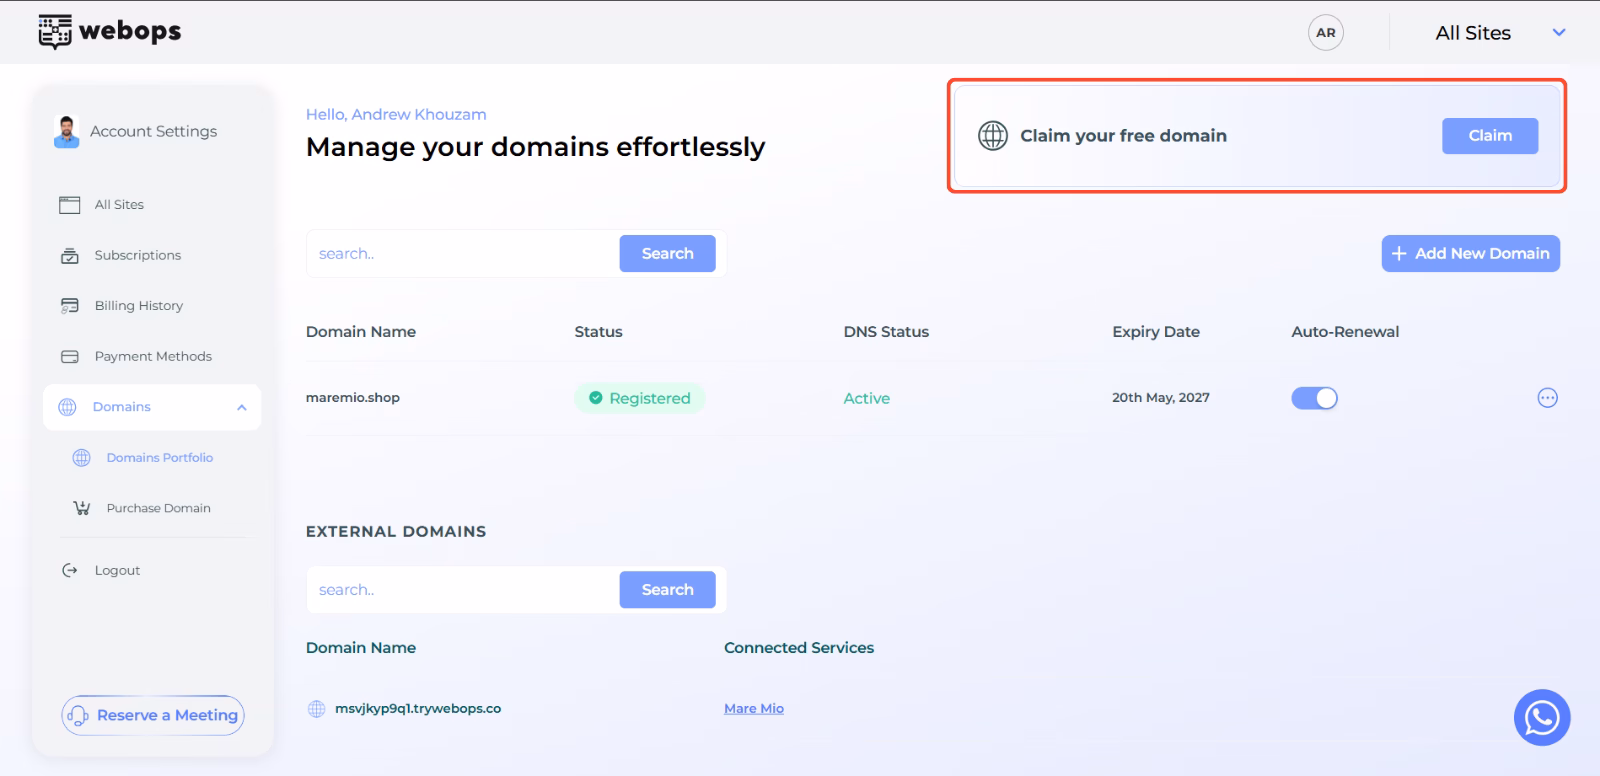
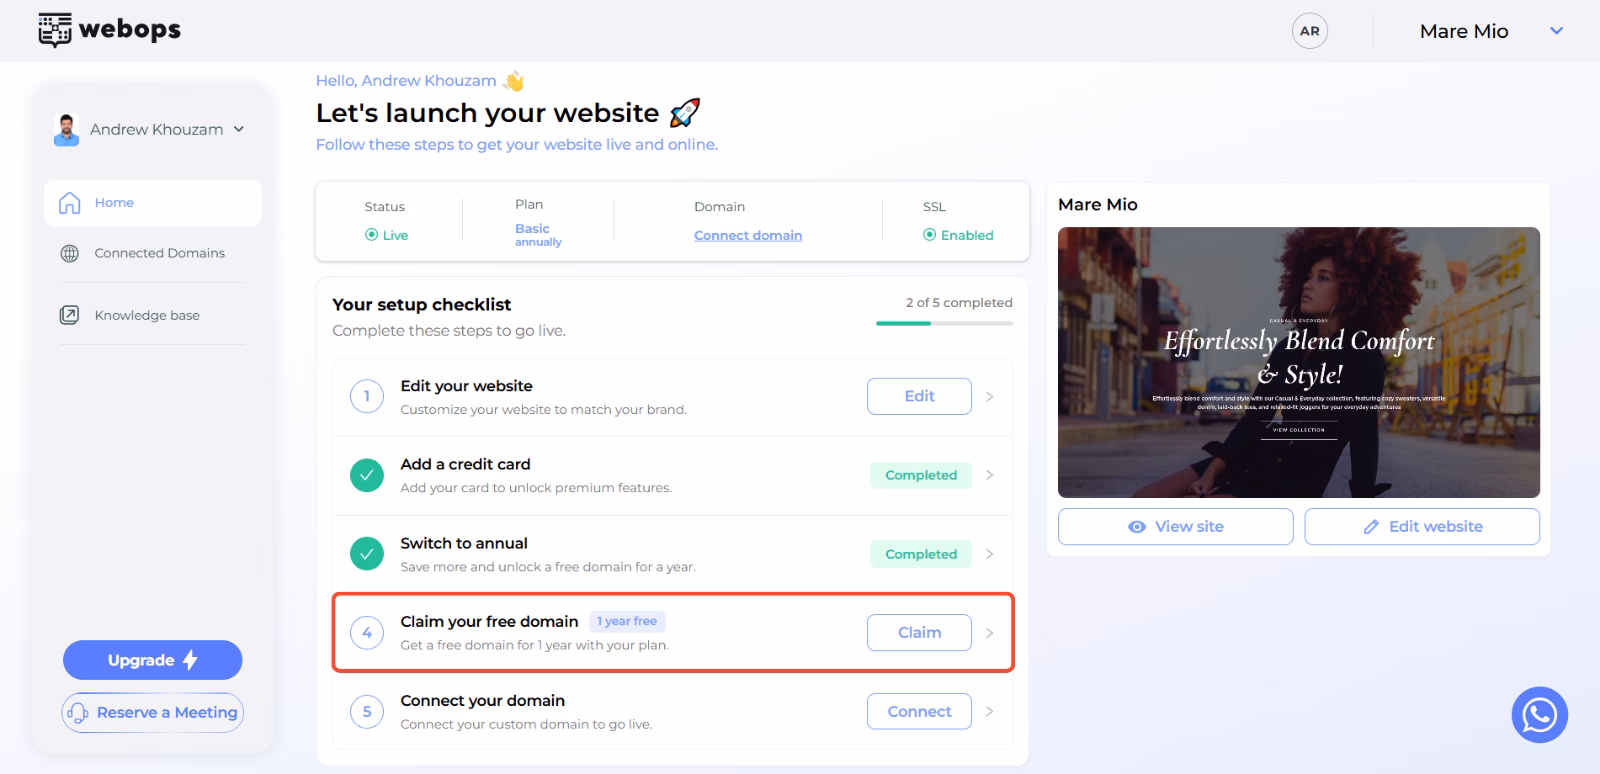
Step 2: Start the Free Domain Claim Process #
Click Claim.
You will be redirected to the Claim Domain page.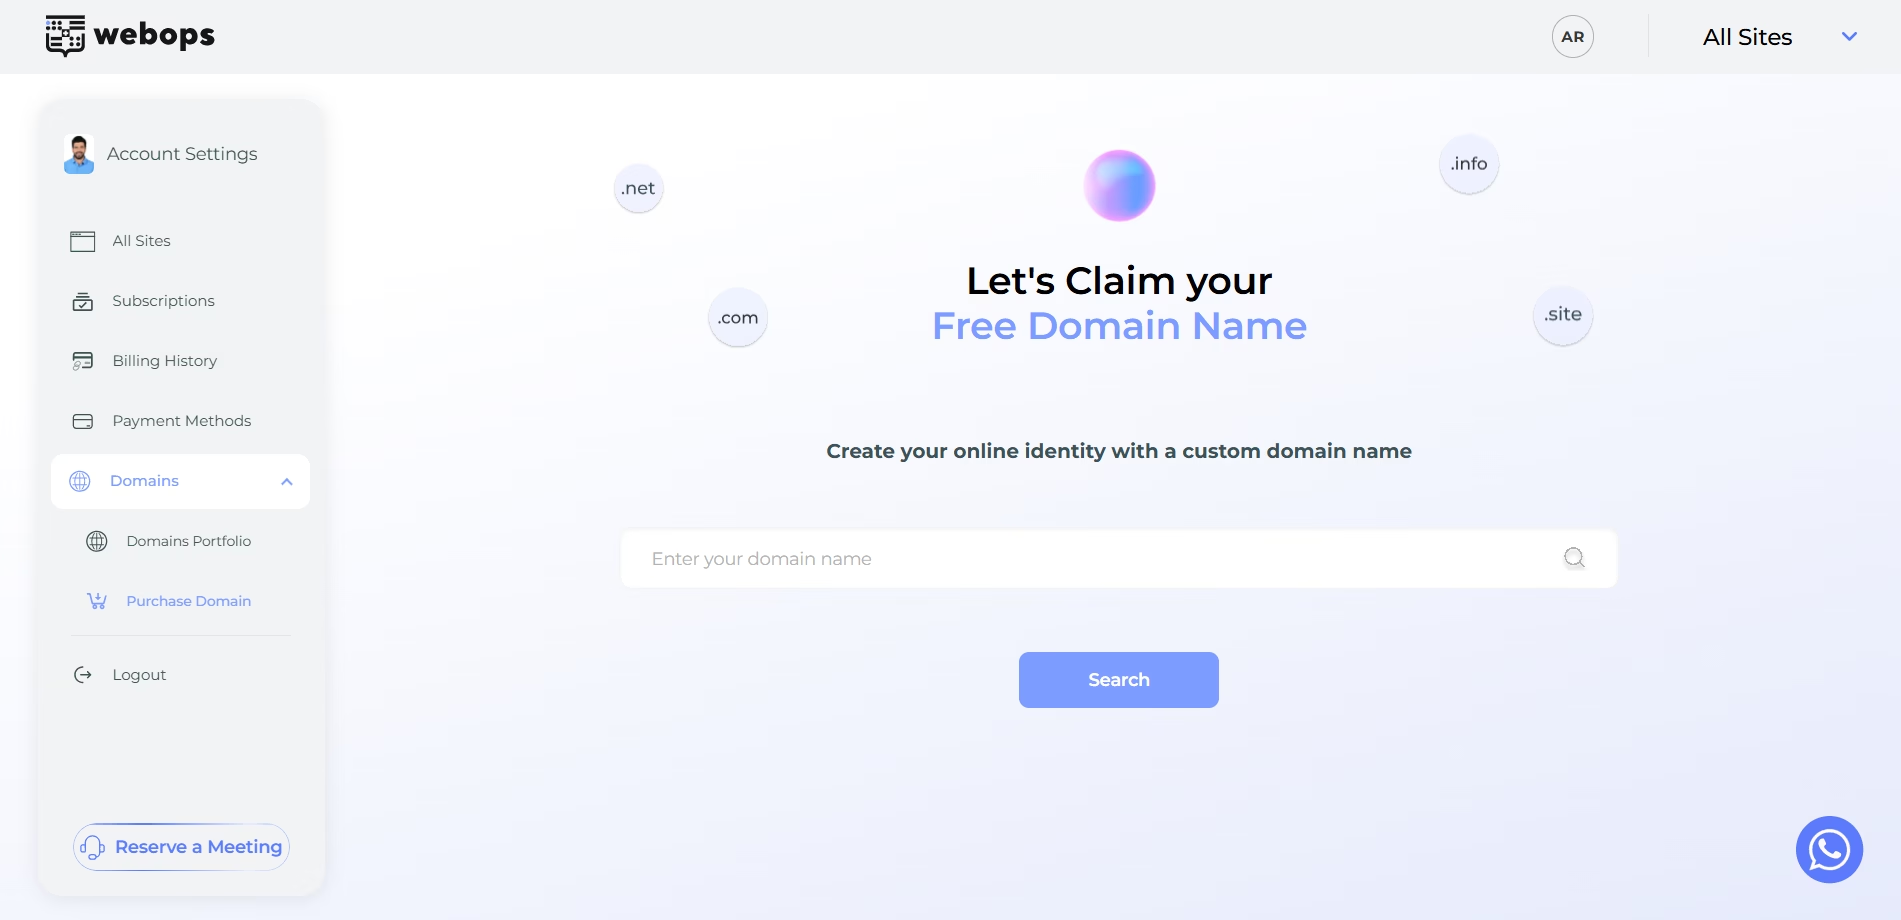
Step 3: Search for a Domain #
Enter the domain name you want to claim.
Then click Search.
If the domain is available and your website is eligible, WebOps will display a Claim option instead of Buy Now.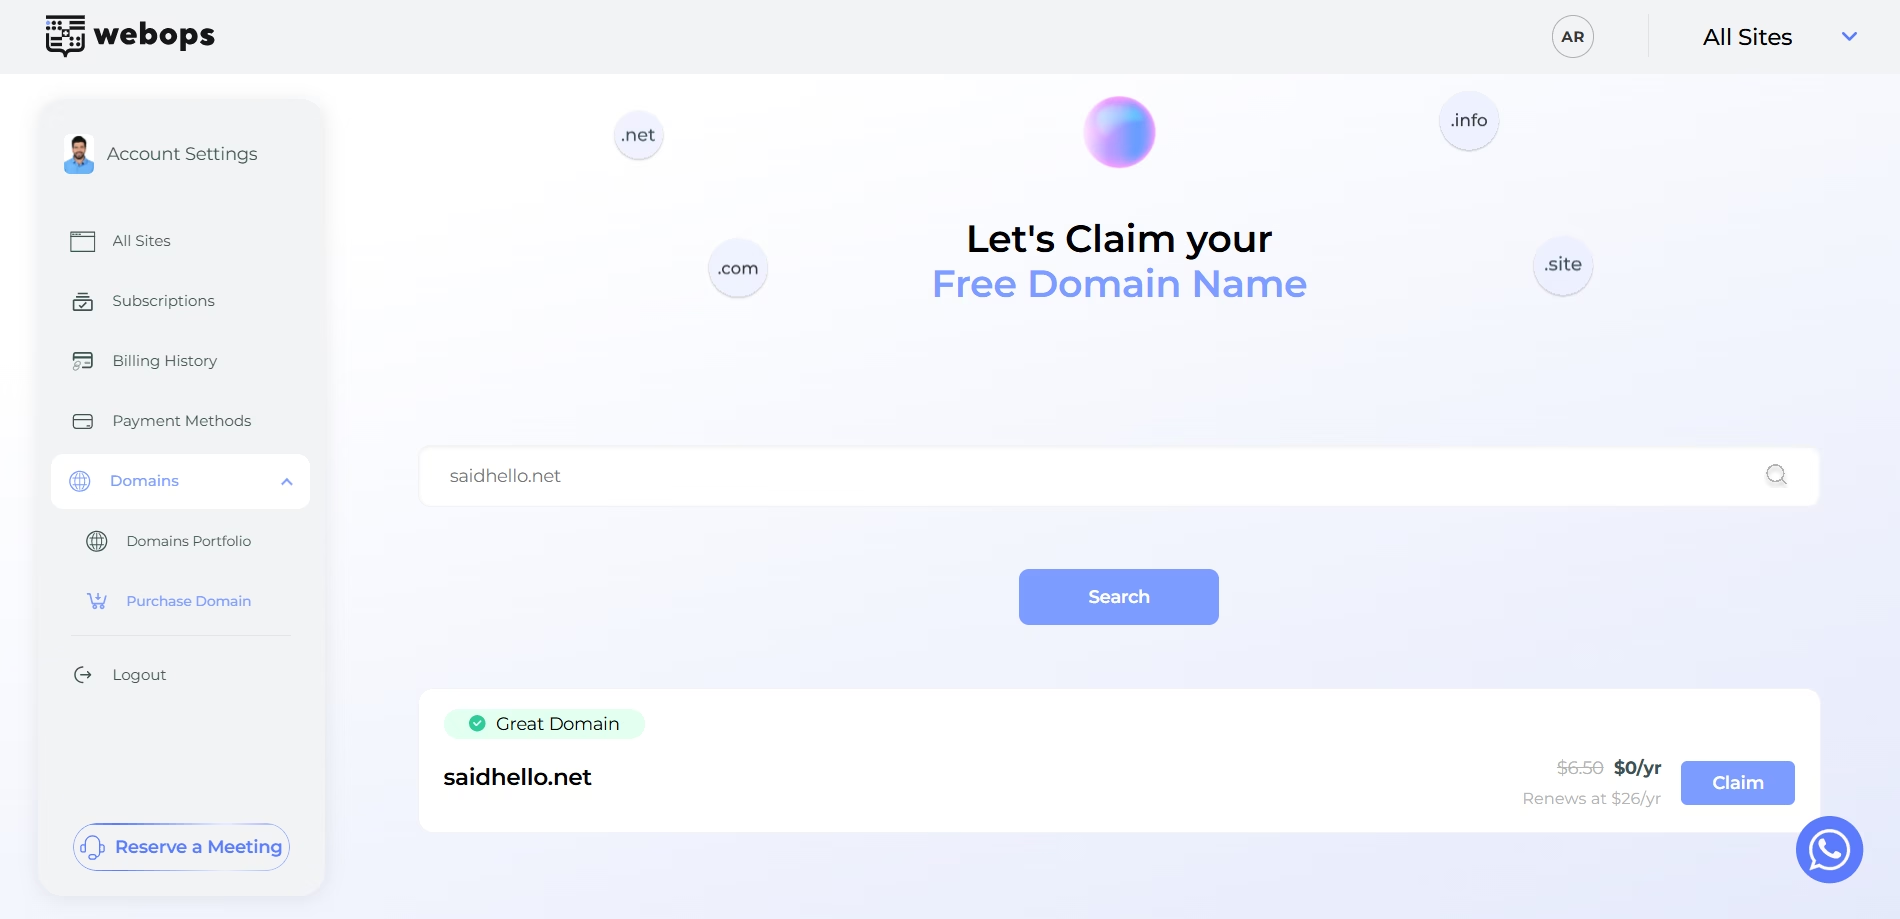
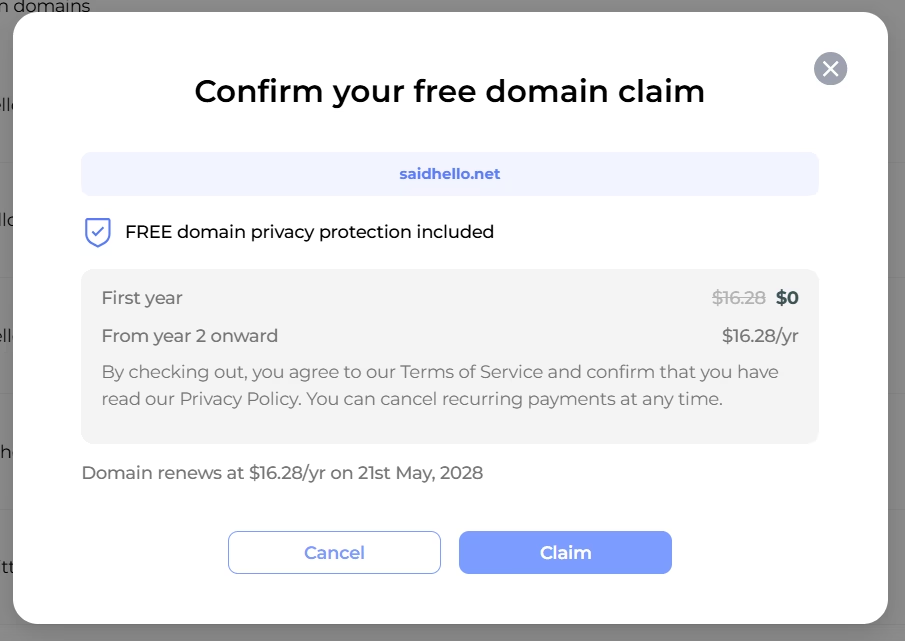
Step 4: Confirm the Free Domain Claim #
Click Claim.
A confirmation modal will appear.
The modal explains:
- the first year is free
- renewal pricing starts from the second year
- free privacy protection is included
Then click Claim to complete the claim.
Step 5: Wait for Domain Activation #
After the domain is claimed successfully:
- it will appear in your Domains Portfolio
- the domain status will begin updating automatically
Initially, the domain may display:
- Registered
- Propagating
Once setup finishes successfully, the DNS Status becomes:
- Active
When the domain becomes Active, it is ready to:
- connect to websites
- manage DNS records
You will also receive an email notification once activation is completed.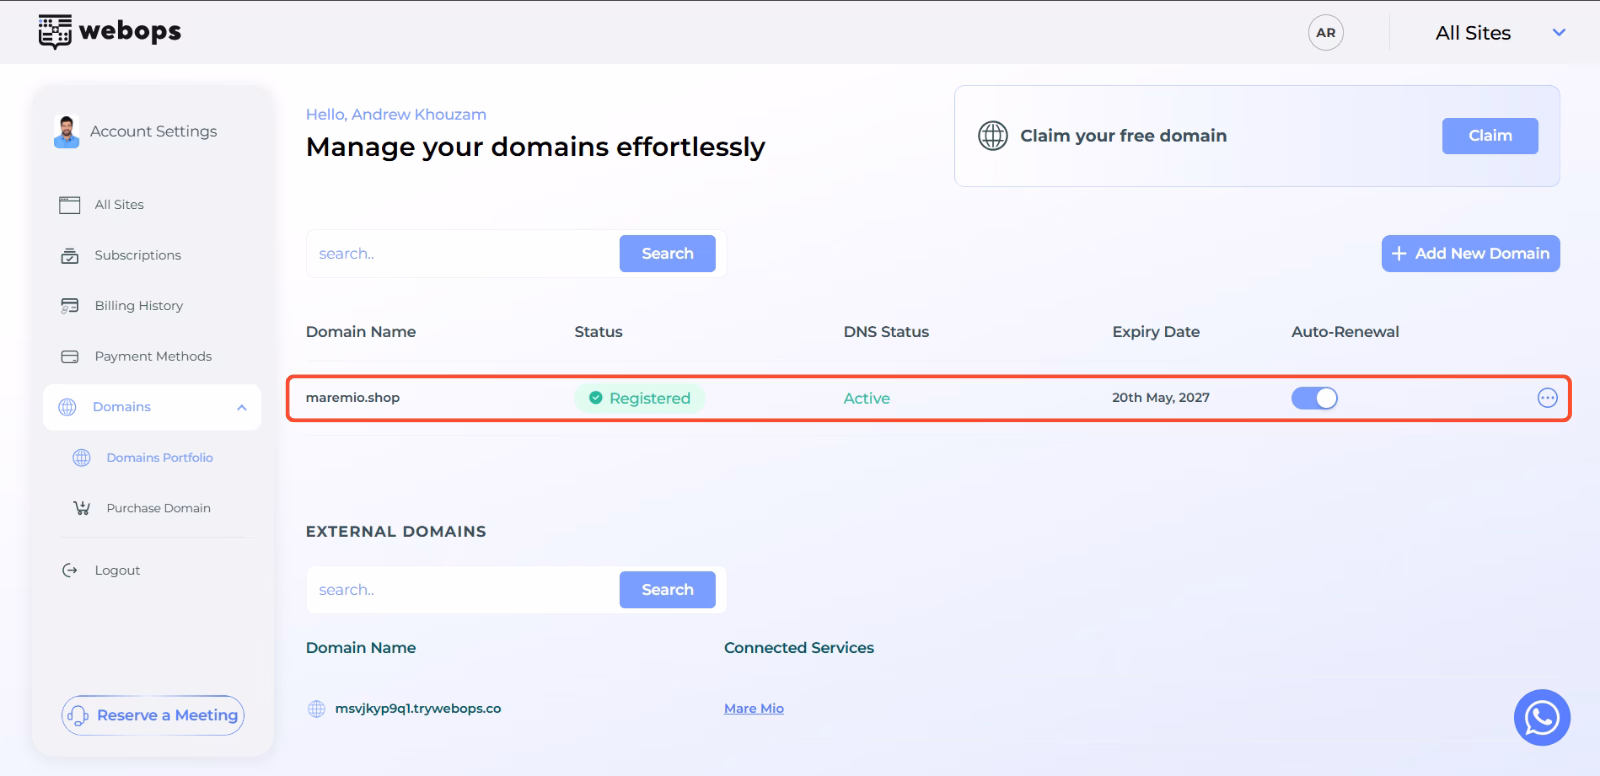
Important Notes #
- Free domains are available only for annual plans
- Each eligible website can claim one free domain
- The first year is free only
- Renewal charges apply starting from the second year
- Claimed domains must become Active before they can be connected to websites
What Happens After Claiming? #
Claiming a domain does not automatically connect it to your website.
After the DNS Status becomes Active, you can connect the domain to one of your websites.
Continue with:
How to Connect a Purchased Domain to Your Website